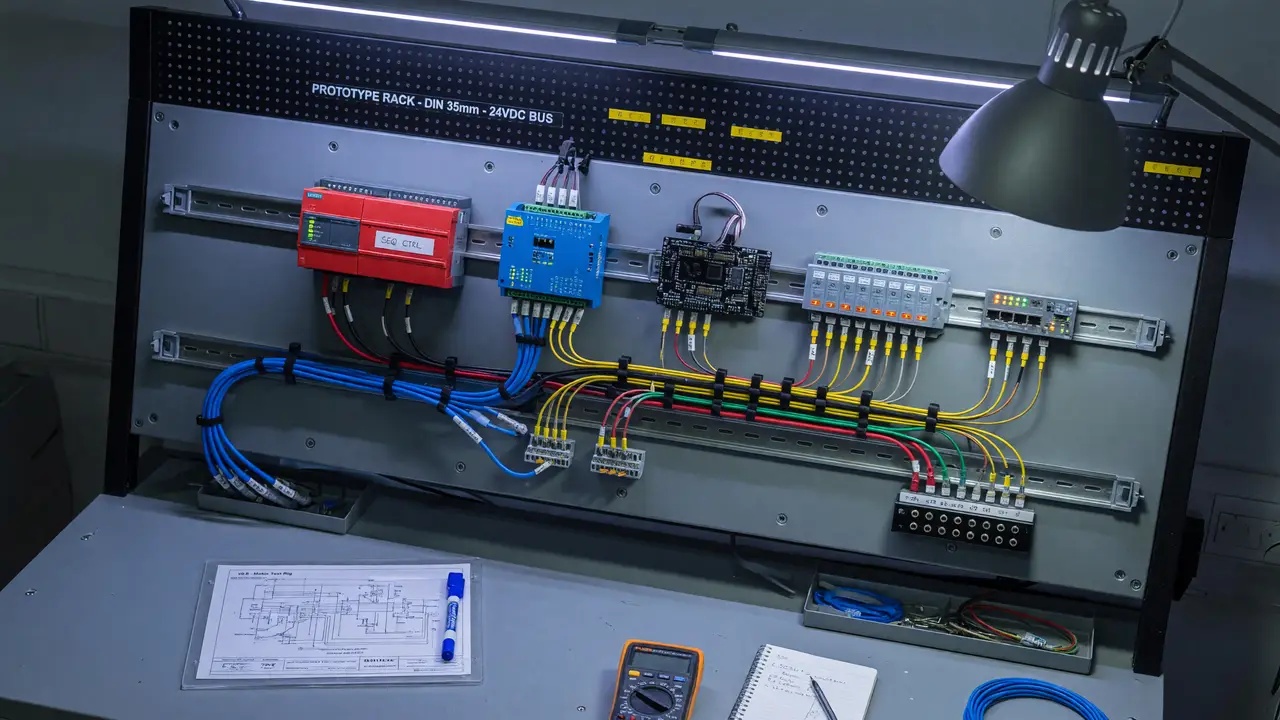
Designing DIN-Rail Mounts: How to Organize Your Prototyping Bench Like an Industrial Panel
Learn how to use standard DIN rails to organize your prototyping bench like an industrial panel, including profiles, sourcing, enclosures, 3D-printed clips, and a practical workflow.
Messy breadboards and loose modules slow you down with every iteration. Industrial control panels avoid this mess with one standard mechanical interface: the DIN rail. The same approach works on a single bench without a factory budget.
DIN Rail Standards and Profiles
The IEC 60715 specification covers the symmetrical top-hat profile found in more than 90 % of installations. Four common variants exist.
TS35 × 7.5 is the default for most prototyping work. It measures 35 mm wide by 7.5 mm high with 1.0 mm steel thickness.
TS35 × 15 adds rigidity for heavier assemblies.
TS15 fits compact terminal blocks.
TS32 (G-rail) shows up mainly in older European gear.
| Profile | Width × Height | Thickness | Typical Use | Weight (kg/m) |
|---|---|---|---|---|
| TS35 × 7.5 | 35 × 7.5 mm | 1.0 mm | General prototyping | 0.30–0.35 |
| TS35 × 15 | 35 × 15 mm | 1.5 mm | High-load or vibration | 0.62–0.65 |
| TS15 | 15 × 5.5 mm | 1.0 mm | Miniature terminals | 0.14 |
| TS32 (G) | 32 × 15 mm | 1.5 mm | Legacy equipment | — |
Perforated versions include 6.2 × 15 mm slots on 25 mm centers, so you can screw them straight to wood or aluminum extrusions.
Sourcing Rails at Reasonable Cost
A 2 m length of zinc-plated TS35 × 7.5 runs €4.66–5.59. Pre-cut pieces from Phoenix Contact cost €2.60 for 250 mm and €4.50 for 955 mm. Aluminum and stainless versions cost two to four times more but make sense when corrosion resistance matters.
Practical takeaway: Buy one 2 m perforated rail and cut it into 300 mm and 500 mm segments. Those lengths cover most benchtop projects with little waste.
Enclosures and Terminal Blocks for Common Boards
Commercial DIN-rail enclosures accept Raspberry Pi, Arduino, and ESP32 boards without modification. The Bud Industries DMB series holds up to three PCBs and offers 6–72 terminals in one snap-fit housing. WAGO TOPJOB S blocks give push-in connections rated 500 V / 24 A for 0.14–25 mm² wire.
Adafruit (€18–20) and Phoenix Contact (€18) sell dedicated mounts that clamp four-hole boards without drilling. Cheaper Chinese ESP32 adapters run €3.80–9.20 if you only need terminal access.
3D-Printed Clips and Custom Mounts
When commercial parts cost too much or aren’t available, printed clips work fine. Models on Printables.com have passed 20 000 downloads with 4.8–5.0 ratings. PETG or ASA provides the needed spring force; PLA is acceptable for light-duty, low-vibration use.
Print with 4–5 perimeter walls and 30–40 % infill. Orient the part so the layer lines run parallel to the rail engagement surface. Heat-insert versions accept M4 or ¼-20 nuts for repeated mounting cycles.
A typical slicer config for reliable clips looks like this:
perimeters = 5
infill_density = 35
layer_height = 0.2
material = PETG
Power Distribution and Protection
DIN-rail terminal blocks and fuse holders keep power wiring tidy and safe. Standard feed-through blocks handle 600 V / 32 A; higher-current versions reach 175–760 A. 5 × 20 mm fuse holders rated 6.3 A mount directly on the rail and cost roughly €8–15 each.
Use these blocks to build a central distribution point: one incoming 24 V rail, fused branches to each module, and clearly labeled neutral and ground terminals. The layout mirrors real panel practice and cuts troubleshooting time.
Recommended Bench Layout Workflow
- Mount a single 500 mm TS35 × 7.5 rail across the rear of the bench.
- Place power distribution blocks at the left end.
- Snap in module enclosures or printed clips in functional groups (sensors, logic, actuators).
- Run 24 V and signal wiring in separate cable ducts or spiral wrap.
- Label every terminal with printable DIN tags.
Any board moves from breadboard to “panel” in under ten minutes while keeping the same electrical connections.
flowchart TD
    A[Mount 500 mm TS35 rail] --> B[Install power blocks left]
    B --> C[Snap enclosures by function]
    C --> D[Separate 24 V and signal runs]
    D --> E[Apply DIN labels]
    E --> F[Ready for next prototype]
Industrial organization does not require industrial scale. One DIN rail, a few terminal blocks, and some printed clips turn scattered modules into a coherent, maintainable system. The same hardware that survives factory floors will survive your next prototype iteration.