My favorite 3D-printing settings for functional parts
The baseline slicer settings I use when a printed part needs to be tested, handled, and revised quickly.
Functional prints are about repeatability before finish.
When I’m prototyping a mechanical assembly, I’m not looking for a gallery piece. I’m looking for an answer. I need to know if the snap-fit holds, if the heat-set insert stays put, and if the motor mount can handle the torque without delaminating.
The biggest mistake I see—and one I’ve made plenty of times—is chasing “pretty” layers on a part that hasn’t even proven its geometry works. If a part takes 14 hours to print because you wanted 0.1mm layers, but it fails the moment you tighten a bolt, you’ve just wasted half a day on a beautiful mistake.
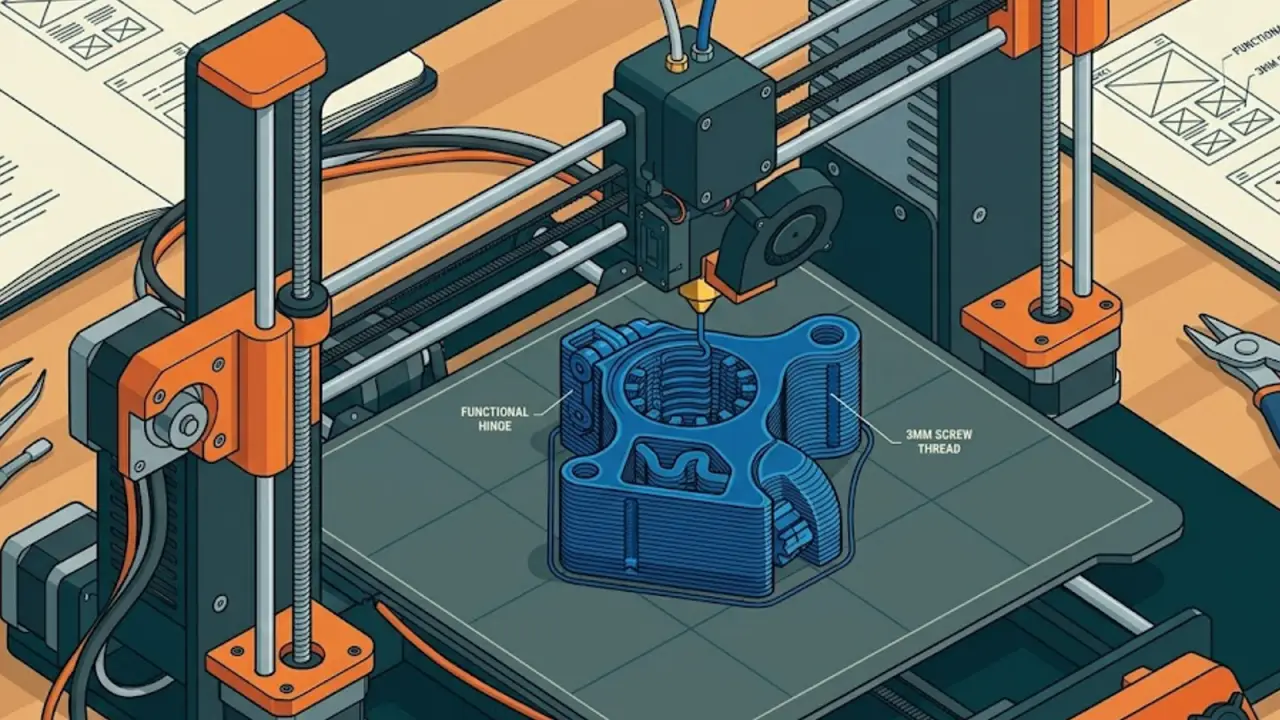
The “Functional” Baseline
My go-to settings are built for the bench test, not the display shelf. I want the part off the bed as fast as possible without sacrificing structural integrity:
- Wall Count Over Infill: If you want strength, don’t just crank the infill to 80%. I go for 4 or 5 walls. It does more for the rigidity of the part and gives fasteners something real to bite into.
- The 0.28mm Sweet Spot: For a 0.4mm nozzle, I almost always print at 0.24mm or 0.28mm layer heights. It’s fast, and the thicker layers usually provide better inter-layer adhesion for functional stress.
- Moderate Speeds: I keep my outer walls slow for accuracy, but I let the infill and inner walls run fast. I’d rather wait an extra twenty minutes for a hole that’s perfectly round than save time and have to reach for a drill bit later.
- Infill Strategy: I stick to Gyroid. It’s equal strength in all directions and doesn’t vibrate the printer to death at high speeds like Grid can.
Print for the Revision
The first print should answer whether the shape, tolerance, and fastener strategy works. I’ve learned to design “test coupons” or small sections of a larger part first. If I’m worried about a specific tolerance, I’ll print just that 10mm slice of the model.
There is a specific kind of relief when you pull a “draft” part off the bed in 90 minutes, slap it onto the assembly, and see it fit perfectly. That momentum is what keeps a project alive.
When to Polish
Once the part survives the bench test and the geometry is locked, that’s when I start thinking about material swaps or surface quality. Switching to an engineering-grade filament or dropping the layer height for aesthetics is a reward for a design that already works.
Don’t let the slicer’s “Standard” settings dictate your timeline. Dial in a “Fast-Functional” profile and use it until the design earns its right to be pretty.