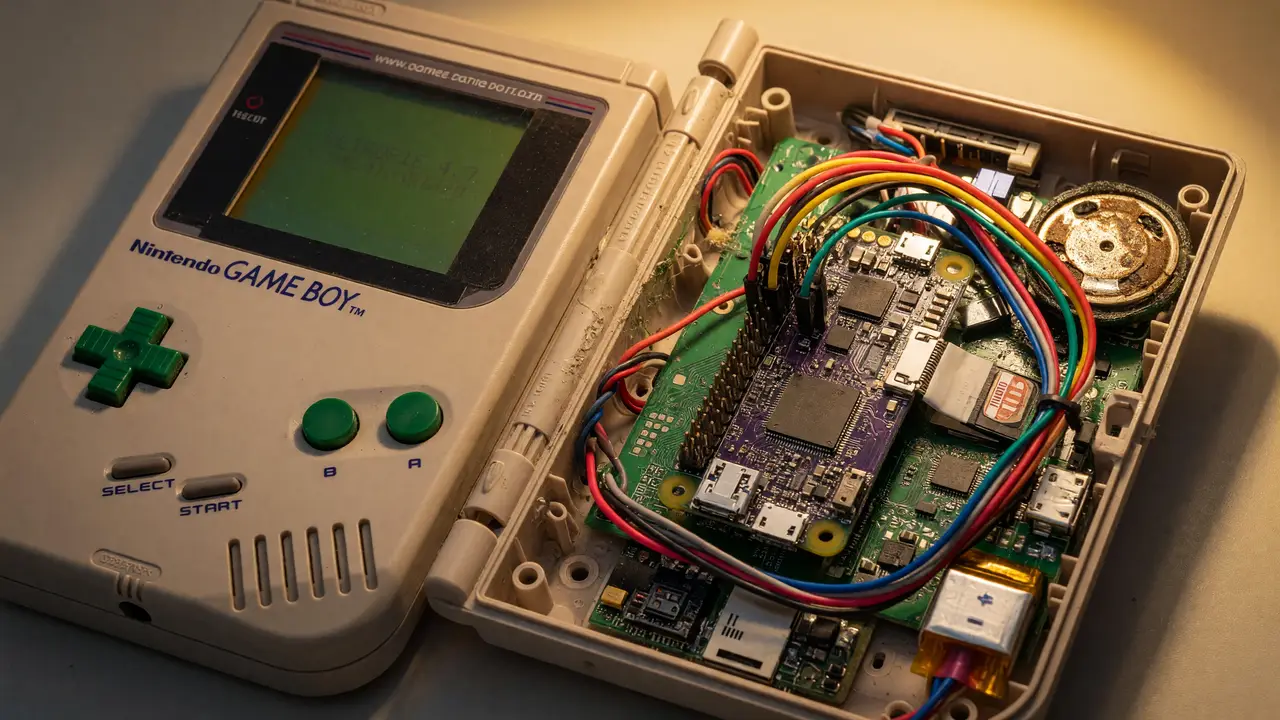
Game Boy Zero: Building a Raspberry Pi Handheld Inside an Original Console Shell
Learn how to build a Game Boy Zero emulation handheld with Raspberry Pi Zero 2 W inside an original DMG-01 shell. Covers displays, power, wiring, and assembly workflow.
The original Game Boy shell measures just 148 × 90 × 32 mm, yet builders have turned it into a capable emulation handheld using a Raspberry Pi Zero. Fitting modern components into that cramped space while keeping the original button layout and feel intact takes careful planning.
The Project’s Origins and Evolution
Wermy posted the first Game Boy Zero videos back in late 2015, right after the Raspberry Pi Zero launched. Those early builds showed you could fit a complete handheld inside a stock DMG-01 shell with nothing sticking out.
Later versions switched to the Pi Zero W, then the Pi Zero 2 W (Broadcom BCM2835 to RP3A0, quad-core 1 GHz). The newer chip handles Game Boy Advance and PS1 games noticeably better while staying inside the same 65 mm × 30 mm footprint. Most 2023–2024 builds use the Pi Zero 2 W, which still sells for the official $15 price.
Shell Constraints and Internal Modifications
Once you remove the original PCB and battery tray, the usable space drops to roughly 140–145 mm × 82–85 mm × 20–22 mm. There are no factory mounting points for Pi hardware, so everyone ends up making custom plates.
Builders usually go with one of three approaches:
- 3D-printed ABS or PETG internal chassis
- Laser-cut acrylic or FR4 plates with M2.5 standoffs
- Simple hot-glue or double-sided tape for the lightest screens
Button cutouts stay exactly as they came from the factory: 12–13 mm A/B holes, rectangular Start/Select slots, and the perforated speaker grille on the right. Those fixed dimensions shape every other choice you make.
Display Choices for 2024 Builds
Screen choice affects both picture quality and battery life. Here’s how the most common panels compare right now:
| Size | Model | Resolution | Interface | Typical Price (2024) | Notes |
|---|---|---|---|---|---|
| 2.8” | Waveshare IPS | 640×480 | DSI | $28–35 | Native Pi support, wide angles |
| 2.8” | Generic HDMI IPS | 640×480 | HDMI | $22–30 | Requires custom EDID config |
| 3.2” | Adafruit PiTFT | 320×240 | GPIO | $35–45 | Lower resolution, mature drivers |
| 3.2” | Generic HDMI IPS | 640×480 | HDMI | $25–32 | Popular for higher-res output |
Most people now reach for the 2.8” Waveshare DSI panels because they’re basically plug-and-play and need almost no extra wiring.
Power Delivery and Runtime Expectations
A 2500–4000 mAh 3.7 V LiPo (503450 or 603450 size) slips into what’s left of the battery compartment. Expect 4 to 7 hours of runtime at normal brightness.
Common power solutions include:
- Adafruit PowerBoost 1000C – the classic choice with reliable boost and charging
- PiSugar 3 – pogo-pin charging, built-in RTC, and an on/off switch
- Pimoroni LiPo SHIM paired with an external TP4056
Most builds still use a physical slide switch mounted on the cartridge slot edge. Every design needs a proper 5 V step-up stage and undervoltage protection so you don’t corrupt the SD card.
# Example config.txt snippet for Waveshare 2.8" DSI
dtoverlay=vc4-kms-dsi-7inch
display_rotate=0
hdmi_force_hotplug=1
Recommended Build Workflow
A typical assembly sequence looks like this:
graph TD
    A[Clean shell & remove internals] --> B[3D print or laser-cut mount plate]
    B --> C[Install Pi Zero 2 W + heatsink]
    C --> D[Mount IPS panel & connect DSI/HDMI]
    D --> E[Wire buttons to GPIO via custom PCB or ribbon]
    E --> F[Install battery + power board]
    F --> G[Test fit, close shell, apply final firmware]
Button wiring usually maps the original membrane contacts to GPIO pins with a small protoboard or flexible PCB. Audio runs through the stock speaker grille with a compact PAM8403 amplifier.
Key Practical Takeaways
- Budget builds stay under $80 when you use generic HDMI panels and a Pi Zero 2 W.
- Premium builds hit $130–150 once you add a Waveshare DSI screen and PiSugar 3.
- Always check the final stack height before snapping the shell shut—20 mm total depth is the hard limit.
The Game Boy Zero remains one of the cleanest ways to turn an old plastic shell into a modern portable emulator. Careful planning around the original dimensions, a solid IPS panel, and reliable power circuitry gives you a device that feels authentic while running current emulation software without issues.