
3D Printed Car Parts: Which Materials Can Withstand Summer Car Interior Heat?
Learn which 3D printing filaments survive extreme car cabin heat (up to 82°C). Full comparison of PLA, PETG, ABS and ASA with temperature data and recommendations.
Car interiors get brutally hot on sunny days. Leave a car outside when it’s 25 °C and the cabin can climb to 117–154 °F (47–68 °C) inside an hour. Dashboards and phone mounts often run hotter still, past 157–180 °F (69–82 °C) . Most everyday filaments simply can’t take that kind of sustained heat, which is why material choice decides whether a printed part survives or sags. Measured Cabin Temperatures vs. Filament Limits Real world automotive studies show the same numbers repeatedly. Dashboard surfaces regularly...
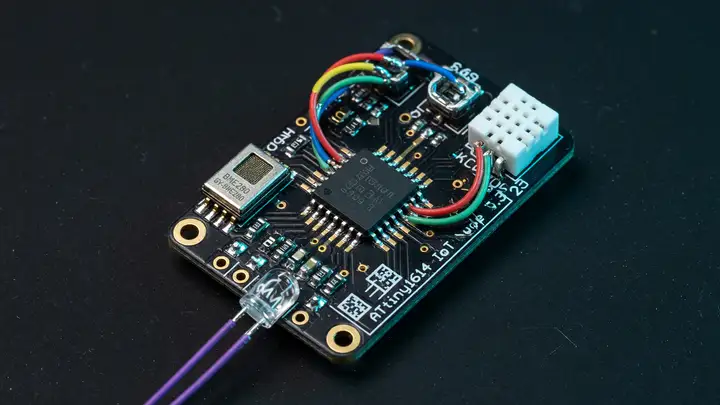
ATtiny1614: Why This Tiny Chip Is Perfect for Dedicated Sensor Nodes
Discover how the ATtiny1614 microcontroller excels in dedicated sensor nodes, offering ultra-low power consumption and versatile peripherals for year-long battery life.
When building a sensor node meant to run a year or more on a small battery, the microcontroller often makes or breaks the project. The ATtiny1614 manages this with 16 KB of Flash, a 0.1 µA power down current, and a solid set of peripherals packed into a 14 pin chip. Core Specifications It uses an 8 bit AVR core that clocks up to 20 MHz and includes a hardware multiplier. Here's the memory and I/O breakdown: 16 KB Flash, good for 10k write cycles 2 KB SRAM 256 bytes EEPROM, rated for 100k cycles 12 programmable I/O...
Automating Your Blog: Syncing Obsidian Notes Directly to Git and the Web
Learn how to automate publishing by syncing Obsidian notes to Git and GitHub Pages. Free alternative to paid sync with version history and background deploys.
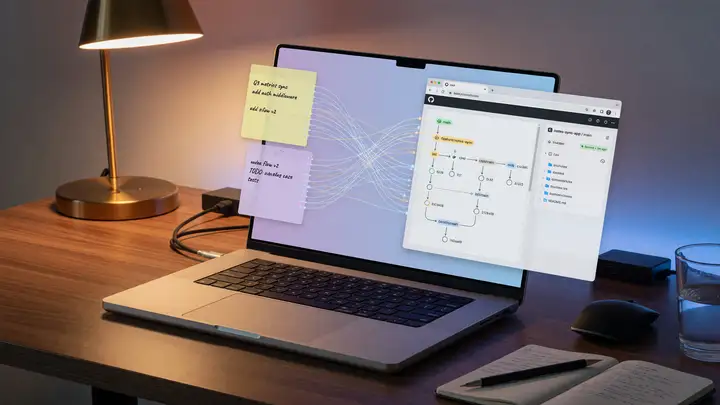
Writers who treat Obsidian as their primary workspace often hit the same wall: manual exports and uploads break flow. Git integration removes that step by turning every save into a deploy trigger. Why Git Beats Paid Sync for Public Content Obsidian Sync is convenient, but it costs $8 a month for 1 GB of versioned storage. Git gives you permanent history, 15 GB free on GitHub, and no recurring fees. Plenty of developers and desktop heavy users have switched entirely once they set up the commit and push cycle....
Best Settings for Carbon Fiber Reinforced Filament (PETG-CF)
Optimize PETG-CF prints with proven nozzle temps, speeds, retraction, drying, and hardened nozzles to prevent clogs and achieve strong, stiff parts.
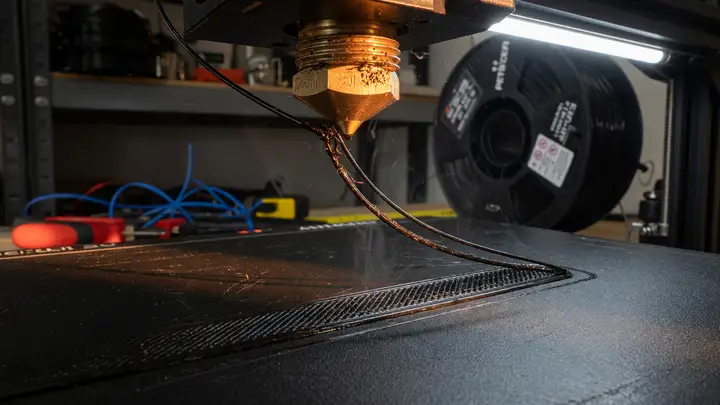
PETG CF combines the impact resistance of regular PETG with added stiffness and stability from the carbon fiber. Stock PETG profiles often cause clogs, weak layer adhesion, and stringing, but a handful of targeted changes to temperature, speed, and hardware resolve those problems. Carbon Fiber Content and Its Practical Impact Most commercial PETG CF filaments contain 8–20 wt% carbon fiber. At the low end (8–10 %), stiffness improves noticeably with only modest nozzle wear. Move into the 15–17 % range and parts...
Beyond Raspberry Pi: Why Used Mini PCs (HP/Lenovo) Make Better Budget Home Servers
Compare used HP and Lenovo mini PCs vs Raspberry Pi 5 for budget home servers. Real-world power draw, RAM, storage, and x86 advantages for homelab use.
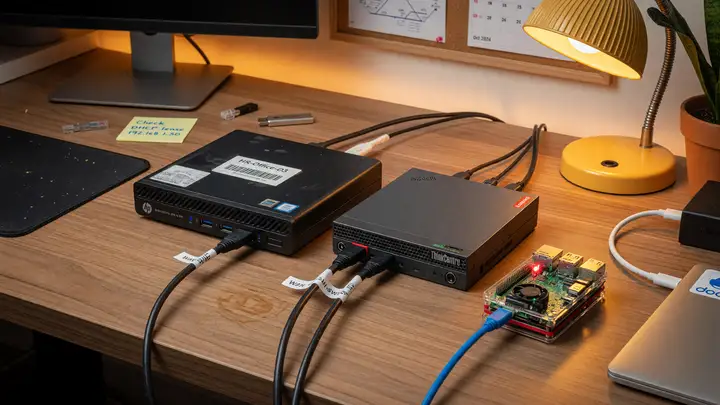
Raspberry Pi boards have dominated budget home server talk for years. Lately, though, a lot of builders are realizing that used corporate mini PCs often give you more for the same money—or less. Used Market Pricing Reality A configured HP EliteDesk 800 G4 or G5 Mini with an 8th or 9th gen i5, 16 GB of DDR4, and a 256 GB SSD typically goes for $100–$200 on eBay. Clean G4 units often land between $110 and $150 . Lenovo ThinkCentre M920q and M90q models sit in the same range. The Raspberry Pi 5 8 GB launched at $80...
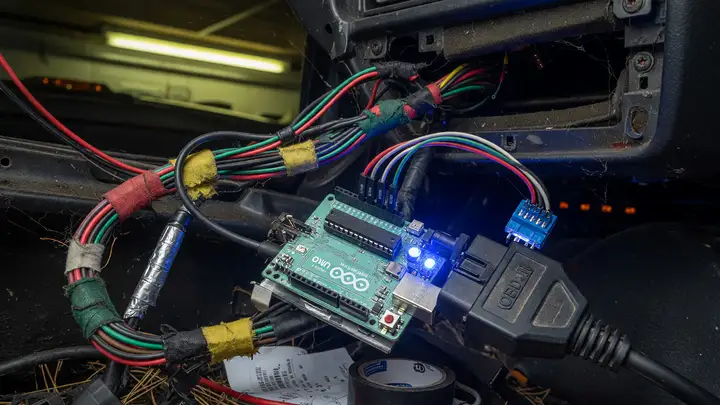
CAN-Bus Reverse Engineering: How to Map Signals in Your Car Using Arduino
Reverse engineer your car's CAN bus with Arduino and MCP2515 to map signals like RPM and speed. Practical hardware, code, and workflow for custom projects.
Your car’s CAN bus carries every critical data point—RPM, speed, throttle position—yet manufacturers rarely publish the mappings. Reverse engineering these signals turns a generic OBD II port into a precise data source for logging, dashboards, or custom controllers. An Arduino paired with an MCP2515 shield gives you a low cost way in. The same approach works across vehicles from VW Golf MK7s to 2016+ Toyotas, provided you work methodically. Hardware Options Compared Three Arduino compatible modules show up in most...
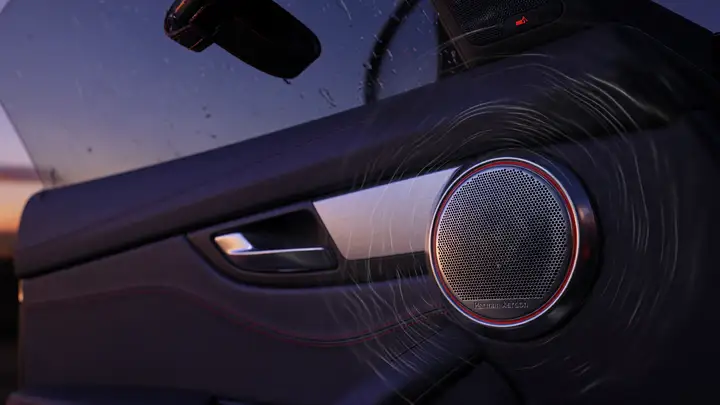
Crackling Speakers in Your BMW Z4? Trace It Before It Spreads
Diagnose and fix crackling speakers in BMW E85/E86 Z4 models. Common causes include amplifier corrosion, water leaks, and speaker failure. Step-by-step guide and repair costs.
Older E85 and E86 Z4s often start crackling once they reach 15–20 years old. The problem almost never stays with a single speaker. Water leaks, age, and electrical gremlins usually pull in multiple channels. A systematic check keeps you from buying parts that miss the real issue. Factory Audio Systems at a Glance BMW offered three Philips built systems on the 2003–2008 Z4. Impedance, power handling, and cone materials vary by level, so replacement choices matter. | System | Speakers | Key Specs | Impedance | Notes...
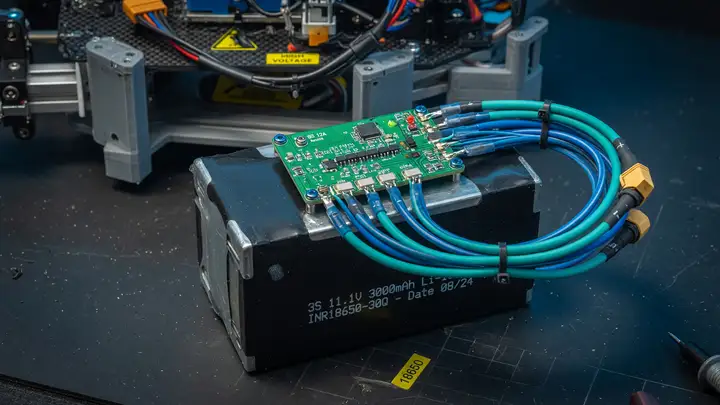
Demystifying BMS: How to Safely Wire a 3S Li-ion Battery Pack for Your Robots
Learn how to safely select, wire, and protect a 3S Li-ion pack with BMS for robotics. Covers voltages, module choices, pinouts, thresholds, and failure prevention.
Li ion packs give robots strong performance without extra weight, but one bad connection or weak protection circuit can kill cells or shut everything down mid run. A Battery Management System (BMS) avoids those problems when you pick the right module and wire it properly. Voltage Specifications Every Builder Must Know A 3S pack stacks three 18650 cells in series. You get 11.1 V nominal, 12.6 V at full charge, and a safe discharge floor between 8.4 V and 9.0 V (2.8–3.0 V per cell). Anything below 2.5 V per cell...
Designing DIN-Rail Mounts: How to Organize Your Prototyping Bench Like an Industrial Panel
Organize your prototyping bench using industrial DIN-rail mounts. Guide covers TS35 specs, Raspberry Pi/Arduino adapters, 3D prints, and terminal blocks for tidy setups.
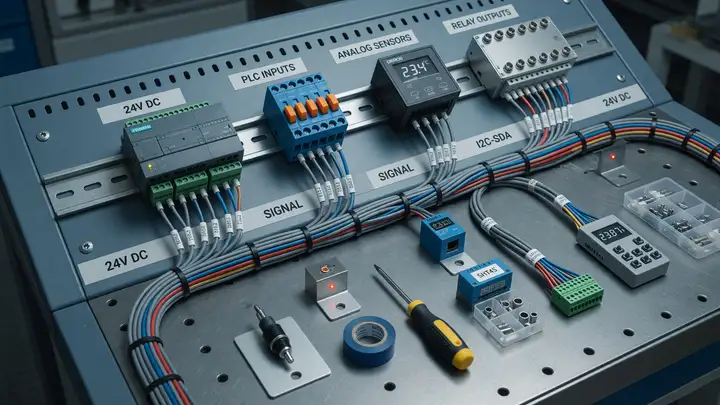
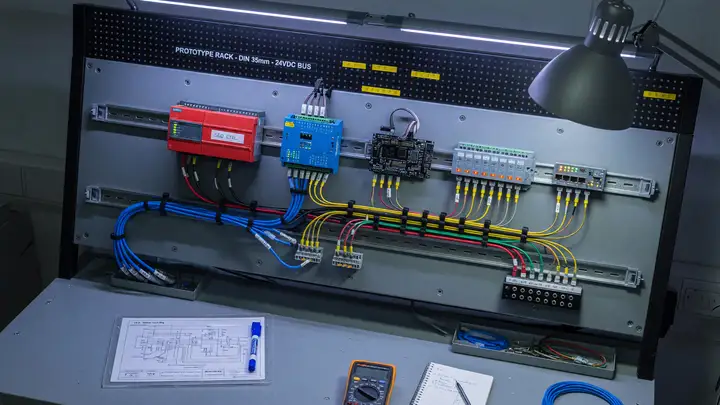
Prototyping benches often turn into a mess of tangled wires and scattered boards. DIN rail systems borrowed from industrial control panels bring order without sacrificing flexibility. TS35 rails and compatible mounts let you treat your workspace like a miniature electrical cabinet. Components snap into place, rearrange quickly, and scale from a single Raspberry Pi to a full sensor array. TS35 Rail Specifications and Load Ratings EN/IEC 60715 defines the 35 mm top hat profile used everywhere from factory floors to...
Designing DIN-Rail Mounts: How to Organize Your Prototyping Bench Like an Industrial Panel
Learn how to use standard DIN rails to organize your prototyping bench like an industrial panel, including profiles, sourcing, enclosures, 3D-printed clips, and a practical workflow.
Messy breadboards and loose modules slow you down with every iteration. Industrial control panels avoid this mess with one standard mechanical interface: the DIN rail. The same approach works on a single bench without a factory budget. DIN Rail Standards and Profiles The IEC 60715 specification covers the symmetrical top hat profile found in more than 90 % of installations. Four common variants exist. TS35 × 7.5 is the default for most prototyping work. It measures 35 mm wide by 7.5 mm high with 1.0 mm steel...
Diode vs CO₂ Lasers: Which Engraver/Cutter Should You Buy for Custom Acrylic Cases?
Compare diode and CO₂ lasers for cutting acrylic. Find out which machine delivers clean results for custom cases and when each type makes sense.
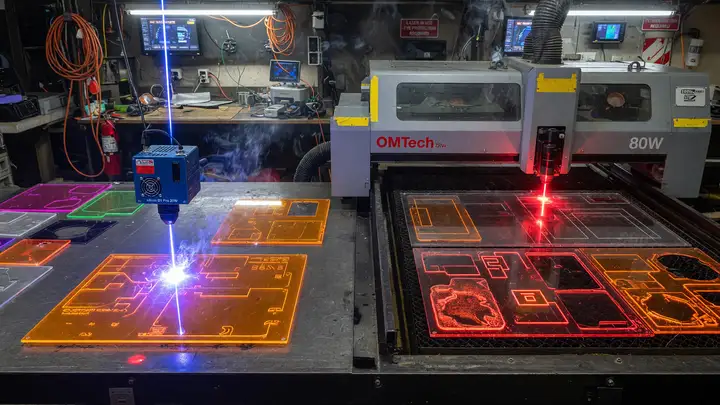
Choosing between diode and CO₂ lasers for cutting custom acrylic cases depends on how each wavelength interacts with the material. Diode machines fit most hobby budgets, yet they struggle with clear acrylic—the very material many builders prefer. Wavelengths and Acrylic Absorption Wavelength determines whether the beam gets absorbed or passes through. Diode lasers operate around 445–450 nm. Clear PMMA transmits nearly all of that blue light, with absorption below 5%. Only dark or opaque sheets absorb enough energy...
DIY Filament Dryer: Do You Really Need a Dedicated Machine?
Compare commercial filament dryers vs. a DIY food dehydrator for 3D printing. Real performance data, costs, and when each option makes sense for PLA, PETG, nylon and more.
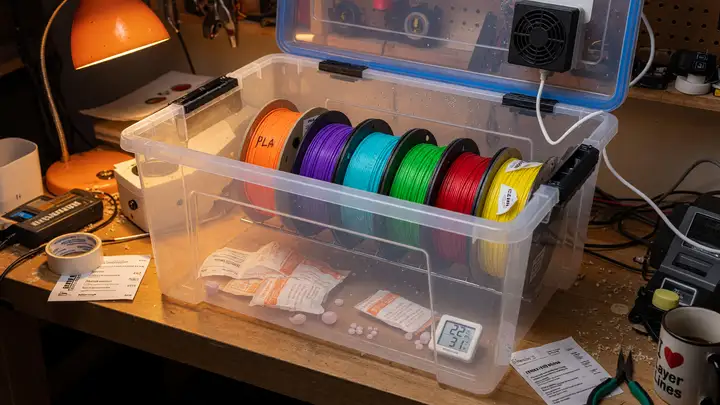
Filament moisture causes plenty of failed prints. Plenty of makers still wonder whether a dedicated dryer is worth the money when a basic $35 food dehydrator often removes moisture faster. Commercial Dryers: Specs and Pricing Three models come up most often. Their real world performance differs once you measure actual spool temperatures and airflow. | Model | Price | Max Temp | Capacity | Power | Humidity Display | Print While Drying | | | | | | | | | | Sunlu FilaDryer S2 | $69.99 | 70 °C | 1 spool | 48 W | Yes |...
DIY MIDI Controller: Build a Custom DJ Mixer with Bourns Slide Faders
Build a custom DJ mixer with Bourns slide faders and Teensy for MIDI control. Affordable DIY solution with open-source code, schematics, and component comparisons.
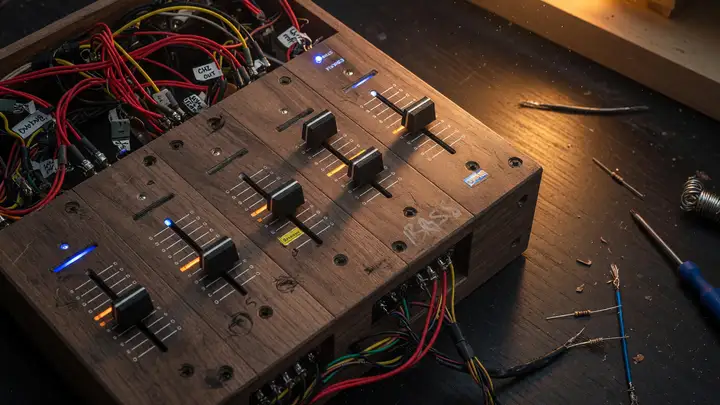
Commercial DJ mixers lock you into fixed layouts and high prices. A custom build using Bourns slide potentiometers gives you the exact channel count, taper, and travel you need—at a fraction of the cost. Bourns PTA and PTF series faders sit at the center of most reliable, low cost MIDI builds. These carbon track pots handle audio tapers, center detents, and travel lengths from 15 mm to 100 mm, with cycle ratings between 15 000 and 100 000. Why Bourns PTA/PTF Faders Fit DJ Builds Bourns models strike a practical...
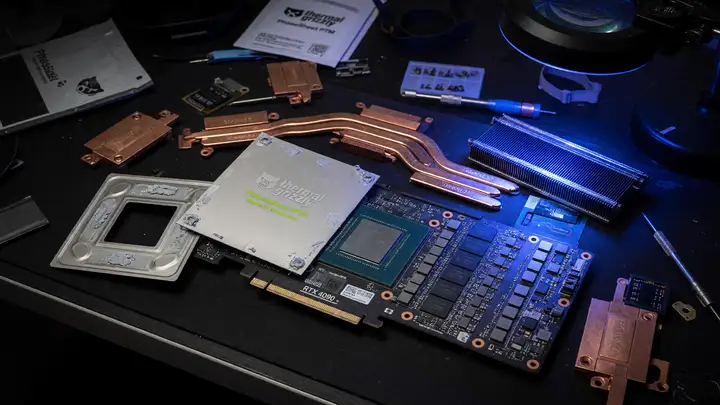
Fixing Thermal Crashes on the RTX 4090: Review of the Thermal Grizzly PhaseSheet PTM
Review of the Thermal Grizzly PhaseSheet PTM phase-change pad and how it resolves RTX 4090 thermal crashes, black screens, and hotspot issues on high-TDP cards.
Plenty of RTX 4090 owners deal with sudden black screens, driver resets, and hard shutdowns once core temps push past 80 °C. The factory paste tends to break down within a couple of years, hardening into a crust that creates hotspots well above 100 °C. Thermal Grizzly’s PhaseSheet PTM uses a phase change pad that avoids pump out while maintaining solid contact on these high TDP dies. Why the 4090 Develops Thermal Problems These cards pull around 450 W under load. Over time the stock paste migrates away from the...
Flipper Zero in 2026: Is It Still the Ultimate Multi-Tool for Pentesting and Prototyping?
Explore whether the Flipper Zero at $169 remains the best multi-tool for pentesting and prototyping in 2026, with firmware updates, comparisons to Proxmark3 and M5Stack, and real-world limits.
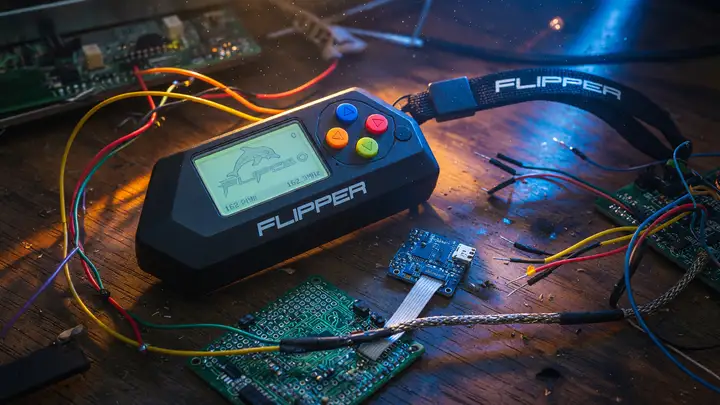
The Flipper Zero launched as a compact, multi protocol handheld that promised to replace a drawer full of test gear. Three years later, firmware sits at the 0.105.x series and no new silicon has appeared. The real question is whether that all in one form factor still justifies the $169 price when specialized tools keep closing the gap. Pricing and Availability in 2025–2026 The official price has stayed at $169 for the black edition through the Flipper Devices store. Shipping still takes two to six weeks because of...
Flipper Zero in 2026: Is It Still the Ultimate Multi-Tool for Pentesting and Prototyping?
In 2026, does the Flipper Zero still hold up as the ultimate pentesting and prototyping device? We compare hardware, pricing, firmware, and alternatives like Proxmark3 and ESP32 tools.
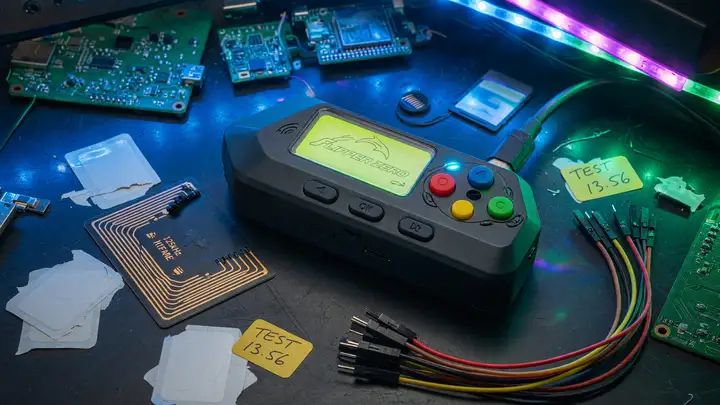
The Flipper Zero hit the market in 2020 with hardware that never changed. Six years on, it still commands premium prices even as faster, cheaper options built around ESP32 chips and dedicated SDR boards have flooded in. For engineers and pentesters, the real question is whether the original device still earns its spot in a pocket or has simply become a legacy gadget. Hardware That Refused to Evolve The core specs remain exactly what shipped at launch: an STM32WB55RG dual core MCU, TI CC1101 sub GHz transceiver,...
Guide to SOP14 Programming Clips: Flashing Chips Without Desoldering
Learn how to use SOP14 programming clips to flash firmware without desoldering chips. Tips for in-circuit EEPROM and MCU programming, clip selection, and reliability.
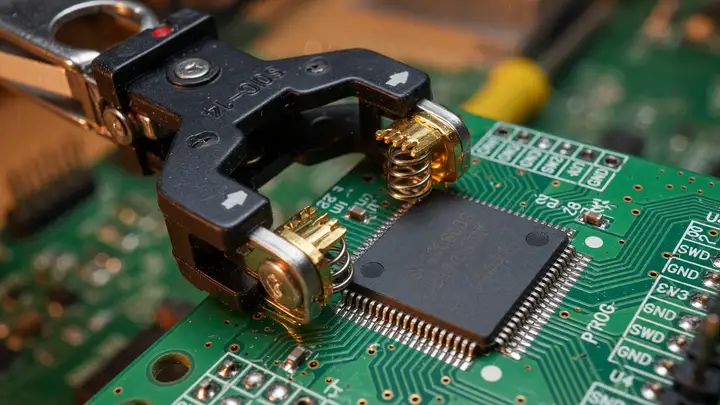
Desoldering an SOP14 package risks lifted pads and damaged boards. A programming clip lets you read and write firmware in circuit, provided the pins are accessible and the rest of the board stays quiet during the operation. SOP14 Package Basics An SOP14 part has 14 leads on a 1.27 mm pitch. The body is usually 3.9 mm wide (narrow body) or 4.4–7.8 mm, with an overall length of 10.2–10.8 mm. Clips grip these leads with spring contacts and break the signals out to a standard 2.54 mm DIP 16 header. Most clips are...
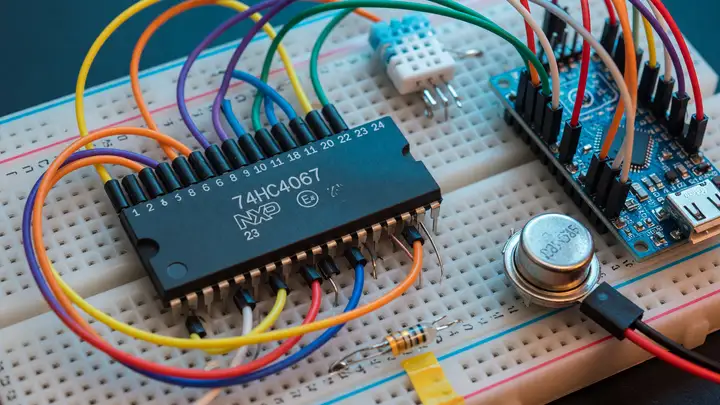
Guide: Getting Started with Multiplexers (74HC4067) for Extra Analog Inputs
Learn how to expand analog inputs on Arduino and ESP32 using the 74HC4067 multiplexer. Covers specs, wiring, code, common pitfalls, and comparisons.
Microcontrollers almost never give you enough analog inputs once your project grows beyond a handful of sensors. The 74HC4067 fixes that by letting you read 16 channels through a single ADC pin. Modules typically cost between $0.76 and $1.58. Core Specifications The chip is a 16 channel analog switch. A single common pin (Z) connects to any of the 16 channels based on a 4 bit address you set on the control pins. Here are the values that actually matter in practice: Supply voltage: 2.0–10 V (74HC version) or...
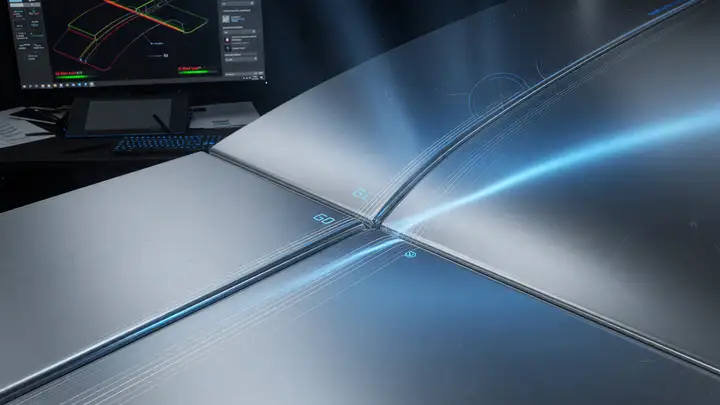
Guide: Understanding G0, G1, and G2 Surface Continuity in CAD Design
Explore G0, G1, and G2 surface continuity in CAD: definitions, tool support from CATIA and Rhino, Class-A tolerances, aerodynamic benefits, and practical modeling guidelines.
Surface continuity decides whether a car body catches light in smooth ribbons or shows obvious seams at every panel edge. In professional CAD work, the difference between G0, G1, and G2 isn’t cosmetic. It directly shapes aerodynamics, tooling cost, and how high quality the finished product feels. What G0, G1, and G2 Continuity Actually Mean Surface continuity describes how two adjacent patches meet along their shared edge. G0 (positional) : The surfaces touch, but their direction can change abruptly. G1 (tangent)...
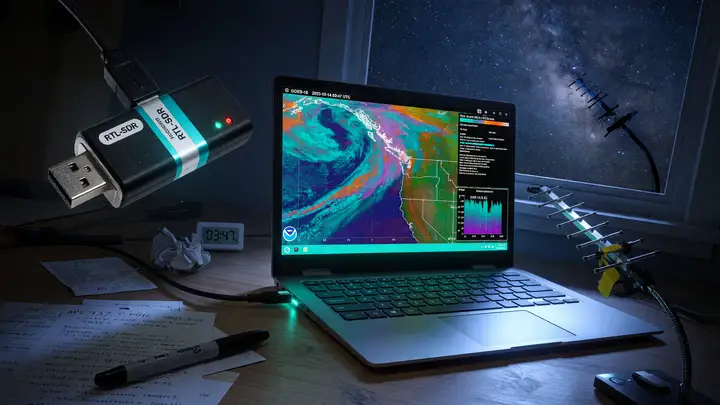
Hack the Airwaves: Getting Started with RTL-SDR for Tracking Weather Satellites
Learn how to receive live NOAA weather satellite images with a $30 RTL-SDR dongle. Setup guide using SatDump for APT signals in the 137 MHz band.
Pull live weather imagery from satellites passing overhead with a $30 USB stick. The RTL SDR Blog V4 turns an ordinary computer into a receiver for NOAA APT signals in the 137 MHz band. The RTL SDR V4: Your Entry Point The RTL SDR Blog V4 tunes from 500 kHz to 1.766 GHz. It includes an internal upconverter for HF work and switches to direct sampling above 28.8 MHz. The R828D tuner, 1 PPM TCXO, and software switchable bias tee (4.5 V / 180 mA) come standard. An aluminum case and thermal pad help keep the 8 bit ADC...
How to Calculate Shrinkage and Scaling Percentages in OrcaSlicer for Technical Parts
Compensate for ABS/ASA shrinkage in OrcaSlicer with filament-level XY/Z percentages. Achieve sub-0.2 mm accuracy on functional parts using a simple calibration workflow.
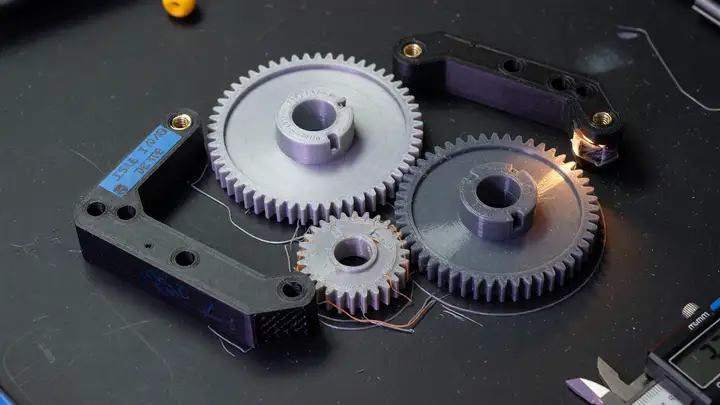
Why Shrinkage Compensation Matters for Technical Prints Engineering filaments contract as they cool. The effect is global and scales with part size. A 200 mm ASA part that measures 199 mm after cooling needs a 0.5 % correction. Without compensation, assemblies that rely on precise hole to pin fits or stack up tolerances become unreliable. OrcaSlicer isolates this correction at the filament profile level so the same scaling applies across every process that uses that material. OrcaSlicer Shrinkage Parameters and...
How to Calibrate Your 3D Printer for Perfect Dimensional Accuracy
Learn how to calibrate your Ender 3 for precise dimensional accuracy using a 20mm calibration cube, steps-per-mm adjustments, and shrinkage compensation.
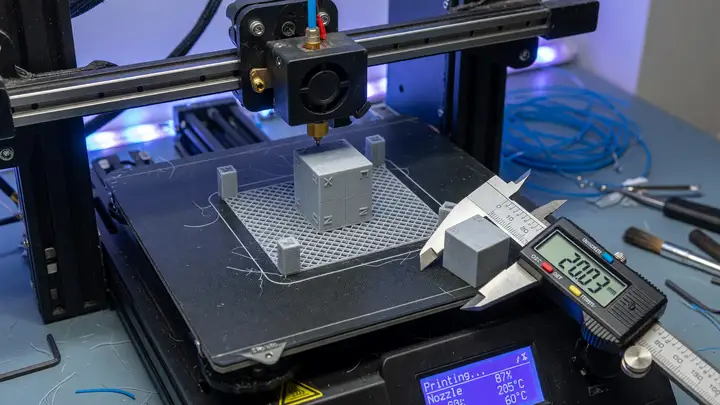
Dimensional accuracy on an Ender 3 rarely happens by accident. Stock machines often ship with steps per mm values that leave a 20 mm cube measuring 19.6 mm instead. That tenth of a millimeter usually decides whether parts fit together or just sit close. The 20 mm XYZ Calibration Cube Print the standard 20 × 20 × 20 mm calibration cube with axis letters on each face. Use 0.2 mm layers, 20 % infill, and turn off cooling for the first two layers to reduce elephant’s foot. Measure each axis in three spots with digital...
How to Design Threads and Mechanical Connections for 3D Printing
Master 3D printed threads with tips on CAD tools, printer settings, materials, clearance tolerances, and repeatable workflows for functional parts.
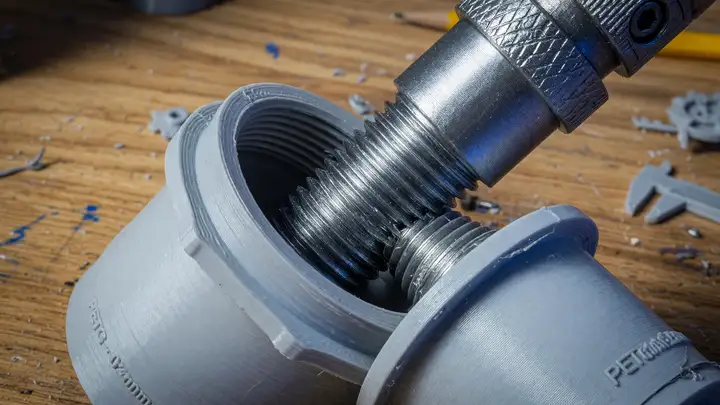
Threads are one of the quickest ways to ruin a functional 3D print. A tiny adjustment to clearance, layer height, or material can mean the difference between a part that screws together smoothly and one that seizes after two turns. Choosing the Right CAD Platform Two tools currently lead for parametric threads. Autodesk Fusion runs $85 a month or $680 a year on the commercial plan, though the free personal tier remains available. The March 2024 update added direct controls for pitch, profile angle, and tip...
How to Design Your First Custom Printed Circuit Board (PCB) in KiCad
Step-by-step guide to designing your first custom PCB in KiCad 10, from schematic capture and layout to DRC, 3D preview, and ordering boards from JLCPCB or OSH Park.
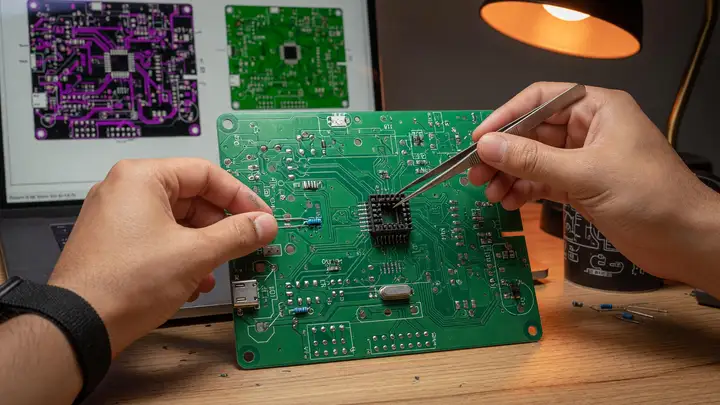
Not long ago, spinning a custom PCB meant either paying for pricey software or grinding through a brutal learning curve. KiCad 10 removes most of that friction. The open source suite, now at stable version 10.0.4, gives you a complete path from schematic to fabrication files, plus a solid 3D viewer and noticeably better routing tools. Getting Started with KiCad 10 Grab the latest build from kicad.org. It runs fine on 64 bit machines with 1 GB of RAM (8 GB feels more comfortable), OpenGL 2.1 or newer graphics, and...
How to Digitally Control Analog Audio Amplifiers via Microcontrollers
Use digital attenuators like the PGA2311 and MCP41HV51 with microcontrollers for precise, low-distortion volume control while preserving analog audio performance.
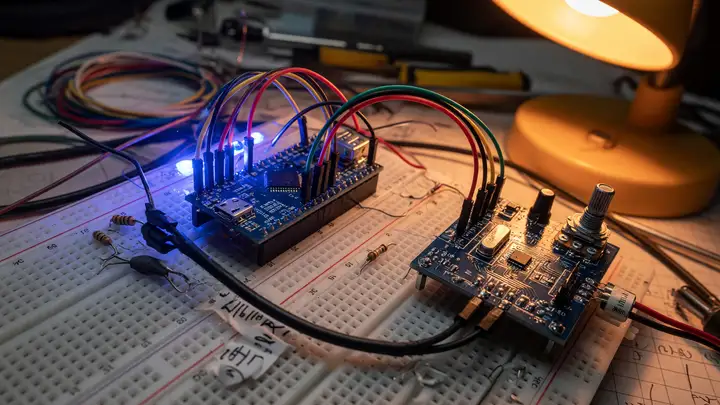
Analog audio paths still deliver the lowest noise floors and most transparent signal handling in many designs. Builders who need remote, preset, or automated volume control don’t have to abandon the analog chain. A digitally addressed attenuator inserted in the right spot preserves dynamic range and avoids zipper noise. The Core Tension Traditional potentiometers wear out and lack repeatability. Simple digital potentiometers often add distortion or restrict headroom. Specialized volume control ICs solve the...
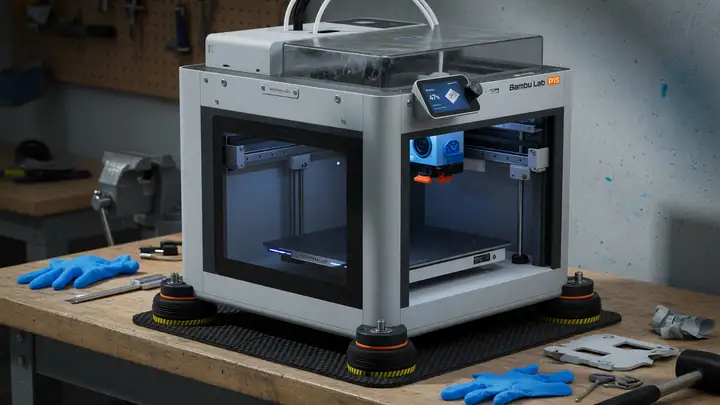
How to Fix Mechanical Noise and Vibrations on Your Bambu Lab P1S
Reduce mechanical hum, belt whine, and table vibrations on your Bambu Lab P1S with firmware calibration, belt tensioning, decoupling methods, lubrication, and print profile tweaks.
Your Bambu Lab P1S prints fast, but the mechanical hum, belt whine, and table shaking vibrations quickly become intolerable in any shared space. A few targeted fixes tackle both motor resonance and structural transmission without slowing the printer down or hurting reliability. Run the Motor Noise Cancellation Calibration Firmware version 01.05.00.00 added a dedicated Motor Noise Cancellation routine for the P1 series. It compensates for stepper motor harmonics during long straight moves and high speed segments....
How to Power Your ESP32 Projects: Battery, USB, or PoE?
Choosing between USB, battery, or PoE for ESP32 projects? Covers power requirements, current draw, runtime estimates, and recommended boards for reliable operation.
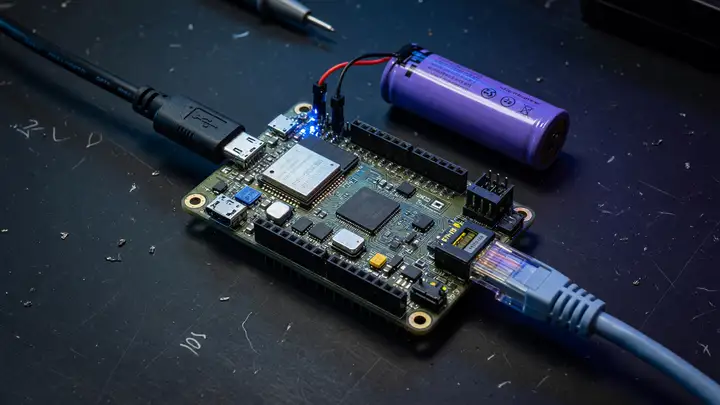
Picking the right power source often decides whether an ESP32 project runs reliably or drops out the moment the radio kicks in. The chip needs 2.3–3.6 V and at least 500 mA of supply current, which immediately rules out a lot of quick and dirty setups. ESP32 Power Requirements at a Glance Espressif specifies a single 3.3 V rail that can deliver 500 mA. Peak draw hits 240 mA during Wi Fi transmission at full power, while a well optimized board can sit at just 5–10 µA in deep sleep. Most real dev boards land between...
How to Safely Integrate Custom Electronics into a Car's 12V System
Learn proven methods for fusing, wire sizing, and power conditioning when integrating custom electronics into a vehicle's 12V system safely.
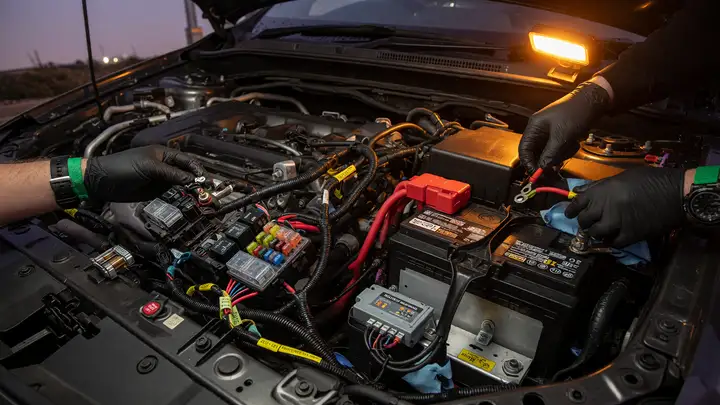
Car electrical systems leave almost no room for mistakes. One undersized wire or a fuse in the wrong spot can leave you stranded or, worse, start a fire. Follow proven rules for fusing, wire sizing, and power conditioning so your custom loads get clean power without issues. Fuse Placement and Sizing Rules Every positive feed needs protection right at the source. SAE J1284 and ISO 8820 both require the fuse to sit within 7 inches (18 cm) of the battery positive terminal or any distribution point. Negative returns...
I2C vs SPI: Protocol Comparison for Sensors
Compare I2C and SPI for sensor integration: speed, wiring, power, device limits, failure modes, and practical guidelines for choosing the right protocol in prototypes.
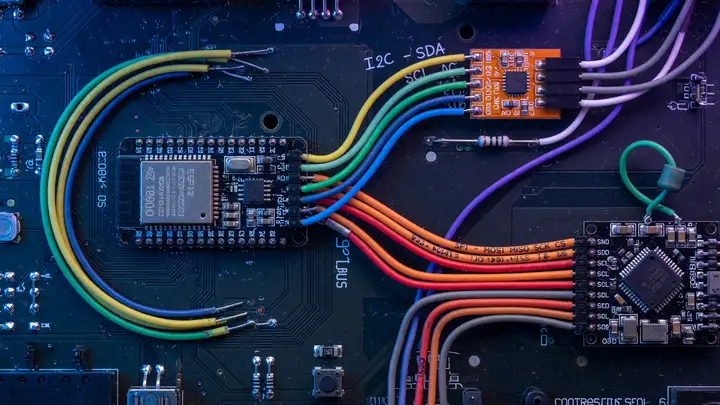
Clock Speed Realities I2C handles most sensors at moderate rates without trouble. Standard mode tops out at 100 kHz, fast mode reaches 400 kHz—the everyday choice—fast mode plus hits 1 MHz, and high speed mode claims 3.4 MHz. Few sensor datasheets actually enable those faster options. SPI has no built in ceiling. Sensors commonly run 1–10 MHz, and clean PCB traces can push 50 MHz. The ICM 20602, for instance, supports 10 MHz on SPI while its I2C side stops at 400 kHz. The real limit almost always sits in the MCU...
JLCPCB vs PCBWay: An Honest Comparison of Turnaround Time and Quality
Compare JLCPCB and PCBWay on turnaround, US shipping, quality, and support with real-world data to help choose the right PCB fab.
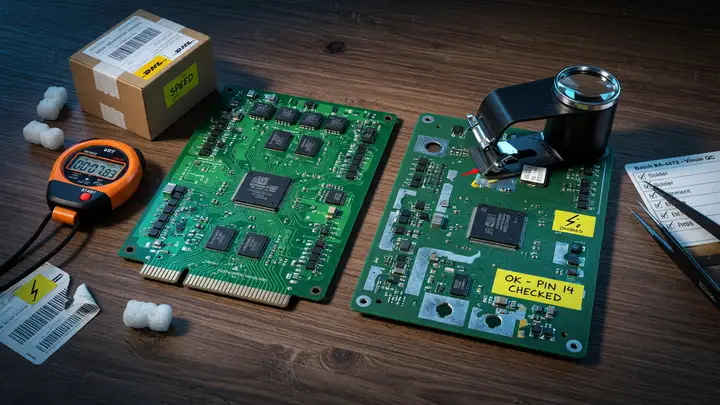
Engineers and makers keep running into the same decision: JLCPCB for low cost and speed, or PCBWay when consistency and support matter more. The gap between quoted lead times and actual delivery often settles the question for any given project. Advertised Lead Times Both fabs advertise 24 hour turnaround on small runs, though real results vary with layer count and order volume. Standard production times (≤100×100 mm boards, FR4 1.6 mm, 1 oz copper) | Layers | JLCPCB (5–50 pcs) | PCBWay (0–50 pcs) | Expedited...
Krita AI Diffusion vs Automatic1111: Which Interface Is Best for AI Art?
Compare Krita AI Diffusion and Automatic1111 for Stable Diffusion. Review integration styles, hardware requirements, workflows, and community support to choose the right AI art tool.
Artists adding Stable Diffusion to their workflow face a choice: generate images inside a familiar painting program or use a dedicated interface for more control. Krita AI Diffusion integrates with Krita, while Automatic1111 stands alone. They vary in how they fit into daily work, what hardware they need, and the size of their communities. Project Scope and Maturity Krita AI Diffusion works as a plugin inside the open source painting app Krita. It relies on a ComfyUI backend and mainly serves people who already...
Mechanical Keyboard Prototyping: Designing a Custom Split Layout in Ergogen
Learn how to prototype custom split mechanical keyboards using Ergogen. This guide covers YAML configs, reversible PCBs, costs, and best practices for rapid iteration.
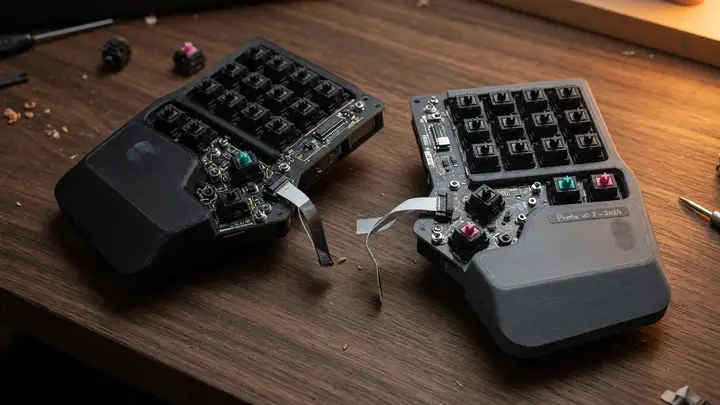
Custom split keyboards solve real ergonomic problems, but many builders still start from someone else’s layout. Ergogen turns a single YAML file into plates, cases, and unrouted PCBs. The practical question is whether the current version supports fast iteration without too much friction. Why Ergogen Works Well for Split Designs Ergogen converts declarative parameters into the mechanical parts of a keyboard. Column stagger, splay, thumb cluster position, and outline expansion all live in one source file. Adjust a...
Mechanical Keyboard Prototyping: Designing a Custom Split Layout in Ergogen
Learn how to prototype custom split mechanical keyboards using Ergogen. Turn a single YAML file into KiCad PCBs, cases, and outlines in minutes.
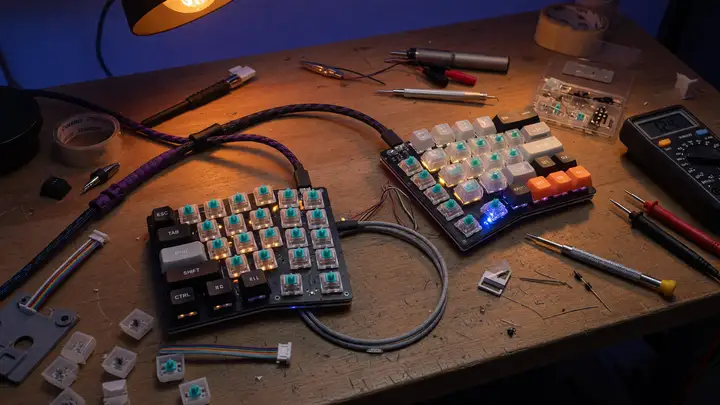
Custom split keyboards feel far more comfortable than most ready made options, yet many builders still spend days fiddling with layouts and PCB work. Ergogen speeds things up by turning one YAML file into outlines, cases, and unrouted KiCad boards. The process goes from config to fabrication files in minutes. Why Ergogen for Split Layouts Ergogen v4.0.0 supports reversible halves, column staggered matrices, and ZMK ready outputs directly from YAML. It spits out DXF/SVG outlines, JSCAD cases, and KiCad PCB...
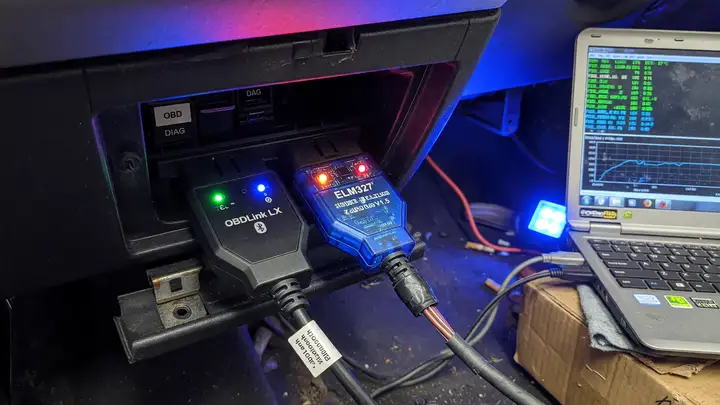
OBDLink LX vs Cheap ELM327 Clones for Data Logging
Compare OBDLink LX and cheap ELM327 clones for OBD-II data logging stability, protocol support, and real-world reliability in continuous sessions.
Review: OBDLink LX vs Cheap ELM327 Clones for Data Logging Plenty of makers grab the cheapest Bluetooth OBD II adapter on Amazon, only to see their logging sessions fall apart after ten minutes. The difference between a purpose built device and a generic clone shows up fast once you need continuous data collection. Hardware and Chipset Differences The OBDLink LX runs on an STN chipset instead of any ELM327 derivative. It handles every legislated OBD II protocol in hardware, including full J1850 PWM/VPW and...
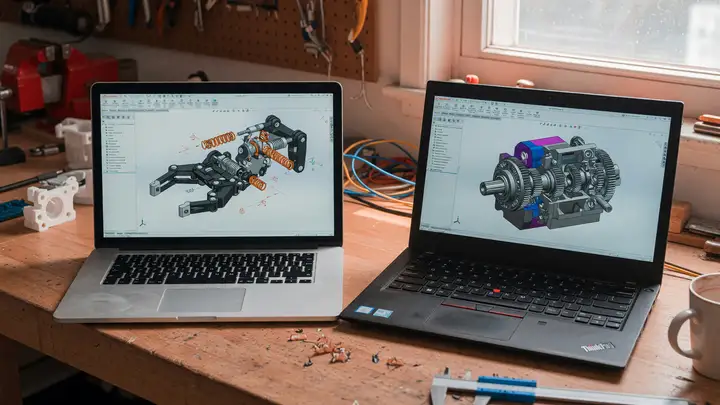
Onshape vs FreeCAD: Best Parametric CAD Software for Makers
Compare Onshape and FreeCAD for parametric CAD. Pricing, collaboration, performance, and which is best for makers and 3D printing workflows.
When choosing parametric CAD, makers face a straightforward trade off: pay for a polished cloud platform or invest time in a free desktop tool that puts you in full control. The better option hinges on your actual workflow rather than marketing claims. Pricing and Licensing Realities Onshape’s free plan includes full parametric modeling, real time collaboration, and version history. The limitations are clear: all documents remain public, private storage caps at 100 MB, and you’re restricted to 10 documents total....
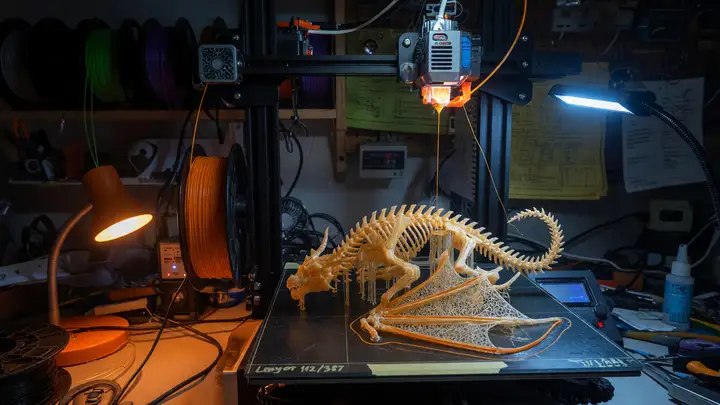
OrcaSlicer vs PrusaSlicer: The Features That Made Me Switch Slicers
Compare OrcaSlicer and PrusaSlicer on calibration tools, printer support, profiles, and workflow speed to decide which slicer fits your 3D printing setup.
Calibration is where most 3D printing workflows hit friction. Printing towers, editing G code by hand, and chasing values across multiple test prints eats up time. OrcaSlicer cuts through a lot of that overhead with built in tools that PrusaSlicer still lacks. The differences in calibration features, printer support, and day to day speed make a strong case for switching once you compare them directly. The Fork Lineage Behind Both Tools PrusaSlicer started as a 2016 fork of Slic3r. Bambu Studio forked PrusaSlicer...
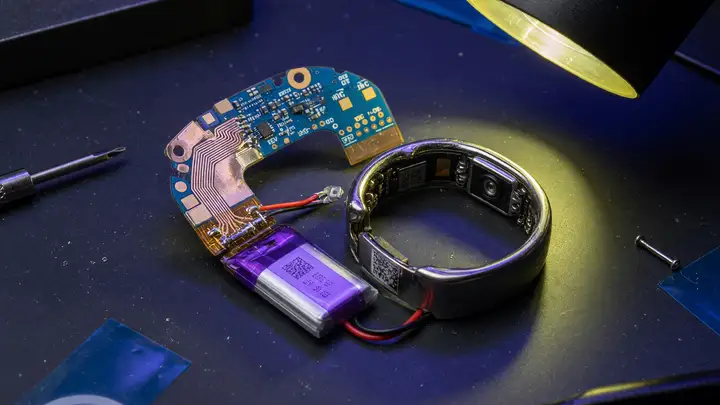
Prototyping a Custom Smart Ring: The Challenges of Flexible PCBs and Tiny Batteries
Explore the engineering trade-offs of curved LiPo cells under 20 mAh and double-sided flex PCBs with sub-5 mm bend radii when prototyping a 2.5 mm thick smart ring.
Packing a week of biometric sensing, wireless connectivity, and continuous operation into a 2.5 mm thick ring forces some tough choices. Two constraints stand out immediately: curved lithium polymer cells that rarely exceed 20 mAh, and double sided flex circuits that must handle repeated bends in the 5–8 mm range. Battery Capacity vs. Runtime Trade offs Commercial rings already sit right at the edge of what’s practical. Real world numbers show how far datasheet specs drift from daily use. | Ring Model | Capacity |...
React with Styled Components: Best Practices for Type-Safe Interfaces
Master type-safe styled-components in React with TypeScript patterns, theme augmentation, and native v6 support to eliminate late type errors.
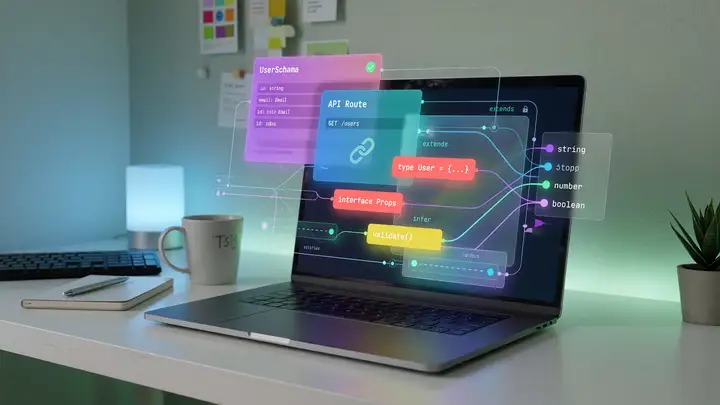
Type errors in styled components usually surface late, after themes and variants have already spread across the codebase. A handful of TypeScript patterns can catch the issues before they spread. Current Stable Version & Native TypeScript Support styled components 6.1.19 (released June 12, 2025) ships with its own TypeScript definitions. The separate @types/styled components package is no longer required. Install the current versions with: The library now exports CSSProperties, CSSObject, CSSPseudos, and...
Reverse Engineering with 3D Scanning: From Physical Car Part to CAD Model
Learn how to reverse engineer obsolete car parts using portable 3D scanners like Creaform, Shining 3D, and Artec, plus mesh-to-CAD workflows in Geomagic Design X.
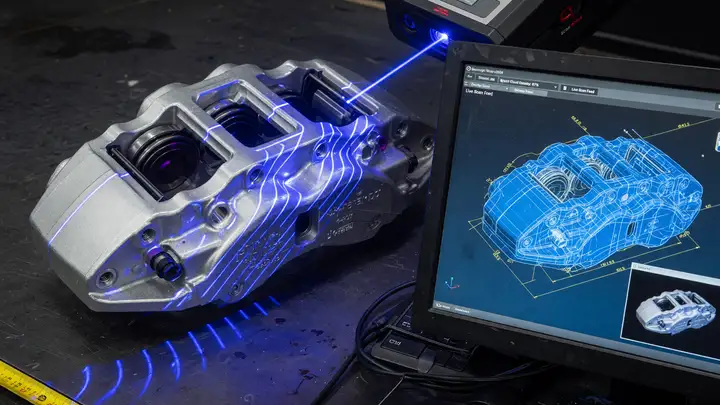
Re creating an obsolete automotive component usually starts with one battered physical part and no drawings. The real challenge is capturing its geometry at usable accuracy without weeks of manual measurements or thousands spent on CMM time. Scanner Options for Automotive Reverse Engineering Three portable systems show up most often in recent automotive work. Their specs differ in accuracy, how they handle surfaces, and cost. | Scanner | Accuracy | Volumetric Accuracy | Speed | Price (2024) | Best For | | | | | |...
Review: BlueRetro – The Ultimate ESP32 Adapter for Retro Console Controllers
BlueRetro review: ESP32 Bluetooth adapter for retro consoles. Supports PS5, Switch Pro controllers with low latency, multitap emulation and wide platform compatibility.
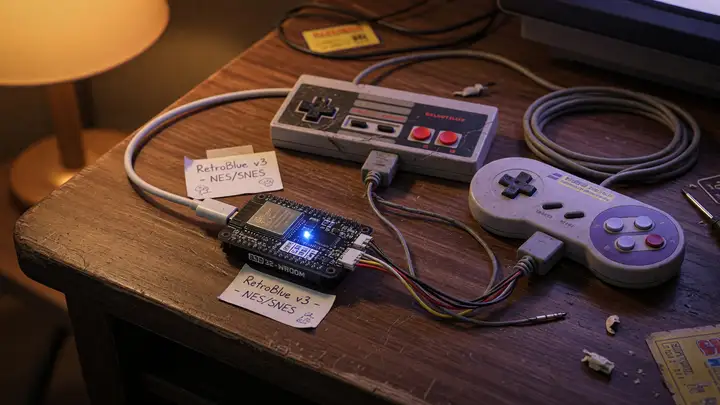
Retro consoles still deliver sharp gameplay, but they leave you choosing between original controllers and awkward extensions. BlueRetro cuts through that compromise by letting you plug in almost any modern Bluetooth controller across a wide range of systems. How BlueRetro Works The device runs on an ESP32, with Bluetooth handling pinned to core 1. It shows up to the console as a native controller through a DB25 connector and simple passive cables. The firmware manages both BR/EDR and BLE at once, so it pairs with...

Review: BlueRetro – The Ultimate ESP32 Adapter for Retro Console Controllers
BlueRetro review: open-source ESP32 adapter bringing Bluetooth HID support, rumble, and multitap to 20+ retro consoles from one universal board.
Retro gamers know the pain of worn out original controllers and the scarcity of good wireless options. Most Bluetooth adapters lock you into one console. BlueRetro sidesteps those limits with a single open source ESP32 board that bridges classic ports to modern Bluetooth HID devices across a wide range of systems. Hardware and Connectivity Specs The adapter runs on a standard ESP32 with its dual core Xtensa LX6 processor and built in Bluetooth 4.2 radios. Power comes straight from the console’s controller port,...
Review: Nice!Nano vs Pro Micro – Is Going Wireless Worth the Premium?
Compare Nice!Nano and Pro Micro controllers for split keyboards: wireless BLE vs wired builds, firmware trade-offs, battery life, GPIO, and cost factors.
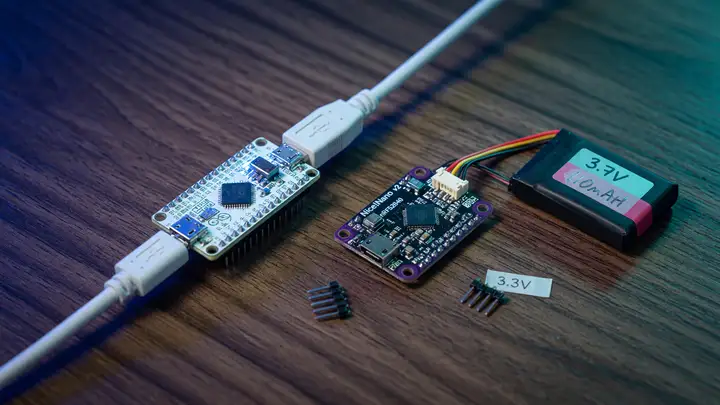
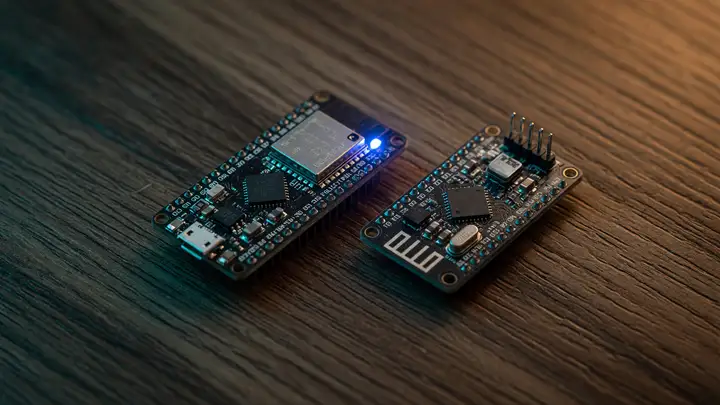
Split keyboard builders face the same choice again and again: stick with the familiar Pro Micro or spend more on the Nice!Nano to go wireless. The price jump lands around double per half, yet the real differences show up in power draw, firmware, and how much flexibility you actually get. Direct Specification Comparison Both boards share the same Pro Micro footprint, but the similarities stop there. The Nice!Nano runs an nRF52840 SoC with 1 MB flash, 256 KB RAM, BLE support, and 23 GPIO pins at 3.3 V. It also...
Review: Nice!Nano vs Pro Micro – Is Wireless Worth the Premium?
Nice!Nano vs Pro Micro comparison for split keyboards: specs, pricing, battery life, and when wireless is actually worth the premium.
The Pro Micro has anchored split keyboard builds for over a decade. The Nice!Nano now brings native Bluetooth to the same footprint. It costs two to four times as much and requires you to manage a battery. For anyone building a Corne, Lily58, or similar board, the real question is whether wireless freedom justifies the extra cost and maintenance. Specs Head to Head Both boards use the classic 34 × 18 mm Pro Micro outline, but their capabilities differ. | Feature | Nice!Nano | Pro Micro (ATmega32U4) | | | | | | MCU...
Review: PolyLite PLA vs Prusament – Which Filament Delivers the Best Finish?
Compare PolyLite PLA and Prusament on tolerance, price, colors and surface finish to decide which filament delivers the best 3D printing results.
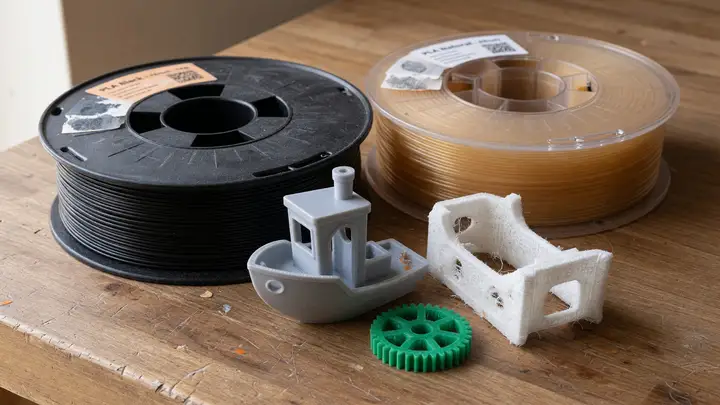
Two premium PLA filaments sit near the top of many makers’ lists. Prusament promises tight tolerances and backs every spool with verifiable measurements. PolyLite costs roughly half as much yet still aims for smooth, reliable prints. Surface finish often decides which one wins for a given user. Diameter Tolerance and Quality Verification Prusament holds diameter to ±0.02 mm and roundness to ±0.01 mm . A QR code on each spool links to actual measurements taken at regular intervals, plus weight, length, and ovality...
Review: Smart Home Energy Monitoring – Shelly EM vs DIY Current Transformers
Compare Shelly EM vs DIY SCT-013 + ESP32 setups for real-time smart home circuit monitoring: specs, pricing, accuracy, safety, and Home Assistant integration.
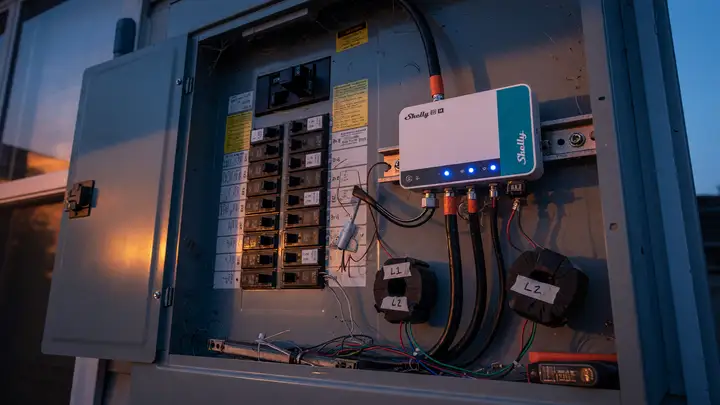
Energy monitoring has moved past monthly bills. Now it's about tracking individual circuits in real time. Most people end up choosing between a ready to go commercial unit like the Shelly EM and a custom build using split core current transformers—typically the SCT 013 000 paired with an ESP32. Both approaches give usable data, but they differ in setup time, calibration consistency, and what ownership feels like after a few months. Core Specifications Side by Side Shelly EM units come with factory paired clamps...
Review: Teensy 4.1 for Audio Projects
Review of the Teensy 4.1 board for low-latency multi-channel audio projects, covering its Cortex-M7 performance, I²S/TDM interfaces, USB Audio support, and comparisons.
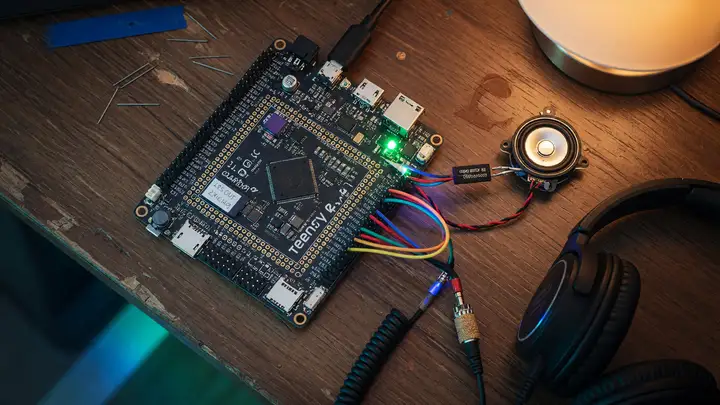
Can a compact $30 board deliver low latency, multi channel audio without dedicated DSP chips? The Teensy 4.1 gets close. Its 600 MHz Cortex M7 and mature audio library already power plenty of USB interfaces, synthesizers, and TDM mic arrays in the wild. Hardware at the Core The NXP i.MX RT1062 sits at the center, running at 600 MHz with both single and double precision floating point units. 512 KB of tightly coupled memory provides single cycle access for critical DSP routines, while the remaining 512 KB of SRAM...
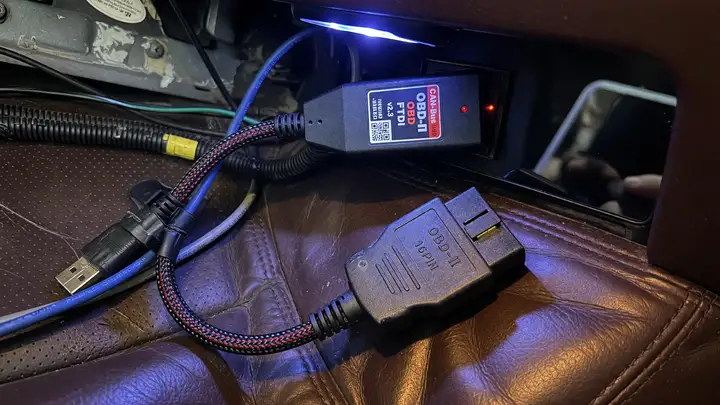
Review: The Best CAN-Bus to USB Adapters for Car Diagnostics
Compare top CAN-Bus to USB adapters like OBDLink, Kvaser, PEAK, and STM32 options for car diagnostics, logging, and development work.
Picking a CAN bus to USB adapter usually comes down to one practical tension: consumer tools built for phone apps versus professional interfaces designed for steady logging and development work. The difference shows up fast in the field. Dropped frames during high speed traces, driver headaches after kernel updates, and isolation failures near high voltage systems all separate the options quickly. Top Contenders in 2024–2025 Five adapters keep showing up in forum threads, manufacturer specs, and real world use:...
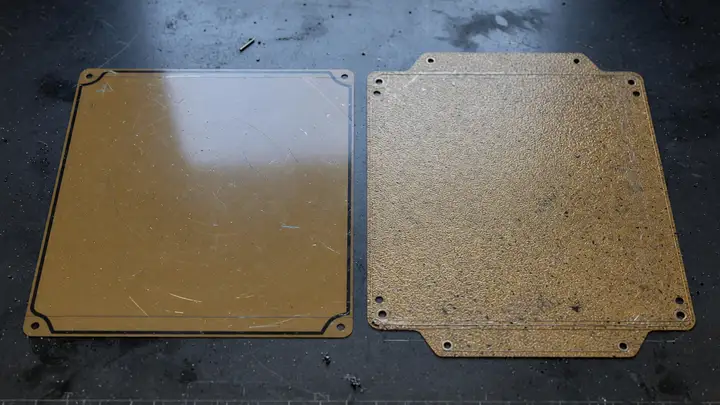
Review: Wham Bam PEX vs Bambu Textured PEI Build Plates
Compare Wham Bam PEX and Bambu Textured PEI build plates for Bambu Lab printers. Covers adhesion, materials, finishes, compatibility, and which plate suits your filaments.
Bambu Lab users face a straightforward choice when swapping build surfaces: stay with the stock textured PEI or try a third party PEX plate from Wham Bam. The better option comes down to the filaments you print most, the finish you want on the bottom of parts, and how much maintenance you’re willing to do. Material Composition and Construction The Wham Bam PEX uses a 0.35 mm custom cross linked polyethylene layer bonded with 3M adhesive to a 0.4 mm (or 0.6 mm XTR) high chromium spring steel flex plate. That...
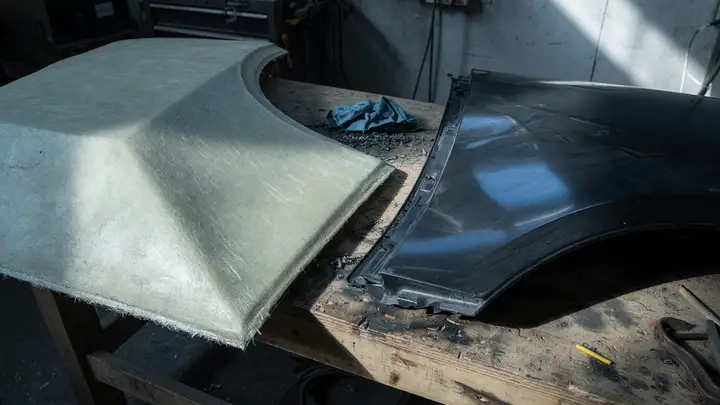
Sourcing Automotive Components: Fiberglass vs ABS Plastic for Aftermarket Parts
Compare fiberglass and ABS for aftermarket automotive parts: pricing, material properties, durability, sourcing lead times, and decision framework for builders.
Aftermarket body panels come with a straightforward trade off. Builders chasing lower weight and higher stiffness lean toward fiberglass. Those who need parts that survive daily driving usually prefer ABS. Neither material wins outright. Price and Availability Fiberglass dominates the aftermarket hood market for cars like the Ford Mustang. Current listings for 2024–2025 models run from $360 to $1,100 depending on year and brand. | Material | Typical Price Range (Mustang Hoods) | Common Suppliers | Notes | | | | |...
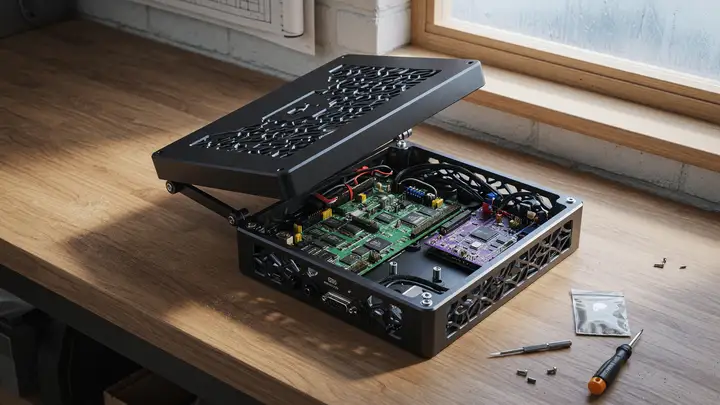
Step-by-Step: How to Design a Custom Electronics Enclosure in Blender
Learn how to design precise 3D-printable electronics enclosures in Blender 4.2 LTS using CAD Sketcher, Hard Ops, and MeshMachine, with workflows for tolerances, wall thickness, and export.
Blender can handle functional electronics enclosures, but most makers still default to Fusion 360 when tight dimensions matter. The difference usually comes down to workflow rather than raw capability. With a few targeted tools and habits, Blender 4.2 LTS manages wall thickness, tolerances, and mounting bosses well enough for reliable 3D printed parts. Preparing Your Blender Environment Start with Blender 4.2 LTS , released July 16, 2024. It includes two years of support and improved boolean and measurement tools...
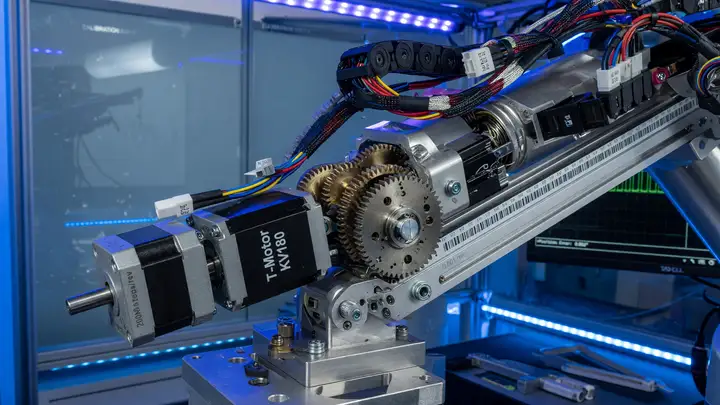
Stepper Motors vs Brushless DC (BLDC) Motors: Which Is Best for High-Precision Robotic Arms?
Compare stepper motors and BLDC servos for robotic arms on precision, efficiency, cost and real-world use in commercial systems like UR5e and Panda.
High precision robotic arms demand sub degree joint accuracy even as loads shift. The choice of motor often determines whether a design maintains ±0.03 mm repeatability or begins to drift after a few hours of operation. Angular Precision and Repeatability Stepper motors deliver reliable open loop performance at low cost. A good NEMA 23 or 34 hybrid with 1.8° steps reaches ±0.02–0.05° repeatability when microstepped at 1/8 or 1/16. Full revolution accuracy typically stays within ±0.05–0.09° because the errors do...
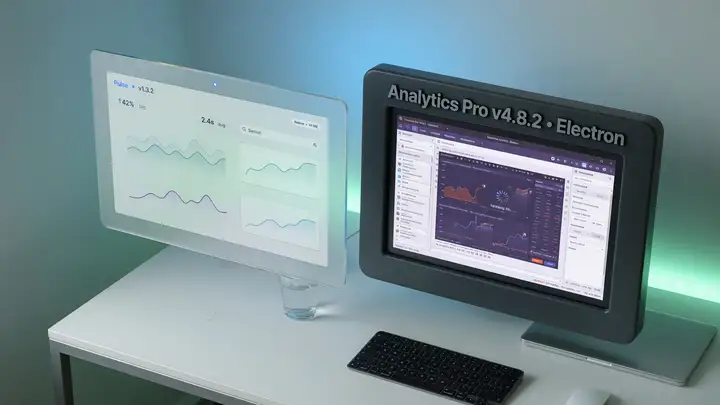
Tauri vs Electron: Why Tauri Is the Future of Lightweight Desktop Apps
Tauri vs Electron: how Tauri delivers dramatically smaller binaries, lower RAM use, and better security with native WebViews and Rust. Real benchmarks and migration results included.
Electron gave web developers an easy path to desktop apps, but the downsides appeared fast in oversized installers. Most Electron apps shipped a complete Chromium build plus Node.js, pushing even basic tools past 80 MB. Tauri takes another route: it uses the system's built in WebView and a Rust backend, cutting the bloat. The Binary Size Gap Electron packages everything inside the installer. Tauri skips that by using the platform WebView already present on the machine and compiling its backend to native code. Real...
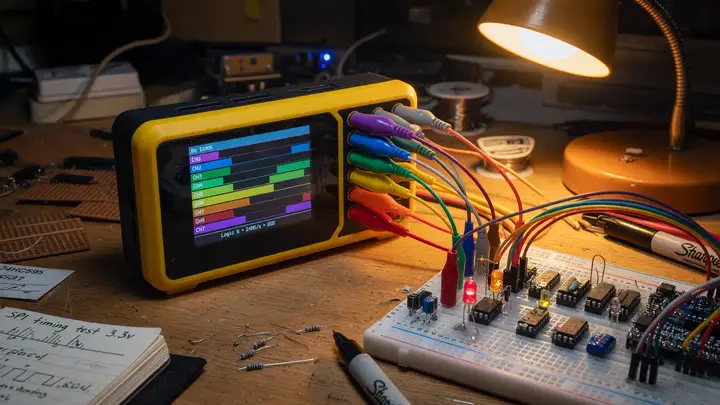
The Best Logic Analyzers for Debugging Digital Signals on a Hobby Budget
Compare the best budget logic analyzers under $150 for Arduino, ESP32 and STM32 debugging, including DSLogic Plus, Kingst LA2016 and open-source PulseView workflows.
Debugging digital protocols on Arduino, ESP32, or STM32 projects often stalls when signals misbehave. A capable logic analyzer removes the guesswork. Plenty of solid options sit under $150 when paired with open source software. Budget Contenders at a Glance Four models keep coming up in EEVblog threads, r/embedded discussions, and recent hobbyist testing. The table below summarizes the specs that actually matter for everyday work. | Model | Channels | Max Sample Rate | Memory / Depth | Current Price | Recommended...
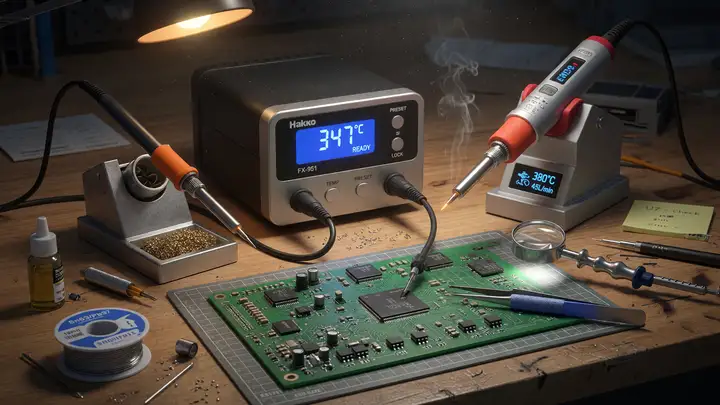
The Best Soldering Stations for Precision and SMD Components Under $150
Compare top soldering stations under $150 for SMD work. Hakko FX-888D, Quicko T12, YIHUA models reviewed for stability, recovery speed and tip options.
Fine pitch SMD work quickly shows where cheap irons fall short. Temperature overshoot, sluggish recovery, and worn out tips turn simple reflow jobs into headaches. Several stations under $150 now deliver the stability and tip options that actually matter for serious hobbyists and engineers. Why Cartridge Tips and Stability Beat Wattage Numbers For SMD components, raw wattage matters less than how fast the tip recovers and how steady the station holds temperature. Cartridge designs put the heater and sensor right...
The Best VS Code Extensions for Systems Engineers and Embedded Developers
Top VS Code extensions for embedded developers and systems engineers, including C/C++, PlatformIO, Cortex-Debug, and serial monitors.
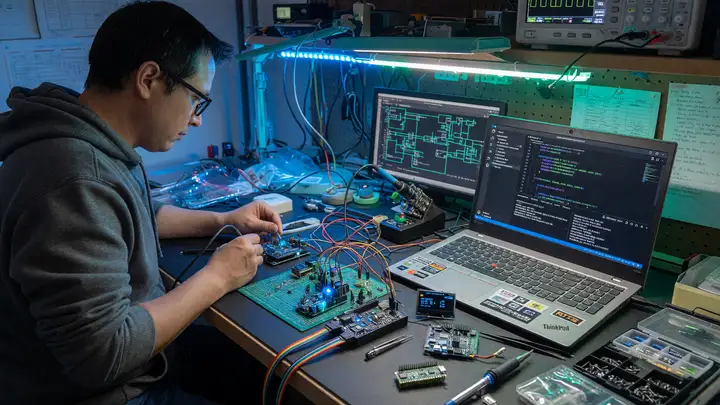
Embedded work still means juggling toolchains, debug probes, register views, and serial consoles. VS Code has settled in as the everyday editor for these tasks, mainly because a few solid extensions bridge the gap between full desktop IDEs and lighter setups. The core stack most engineers rely on includes the Microsoft C/C++ extension for language support, PlatformIO for board handling and builds, Cortex Debug for low level ARM inspection, and a serial monitor for the final hardware link. Microsoft C/C++: The Non...
Understanding RS485 and Modbus: Bridging Industrial Sensors to Your Home Assistant
Learn how to integrate reliable RS485 and Modbus industrial sensors with Home Assistant using USB adapters or Ethernet gateways. Practical setup guide included.
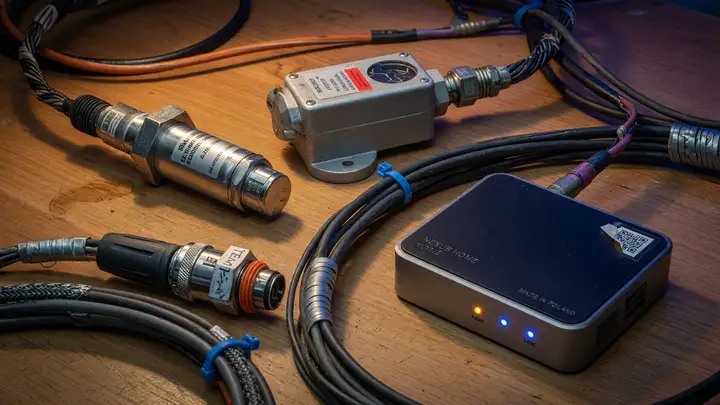
Consumer wireless protocols often fall short once cables stretch out, noise creeps in, or you need rock solid delivery. RS485 with Modbus steps in for exactly those situations, giving you reliable links to industrial grade sensors around the house or workshop. RS485 Physical Layer Limits RS485 uses differential signaling so it can handle long runs and multiple devices on a single bus. The specs lay out clear limits: 1200 m maximum at 100 kbps or slower. 10 Mbps peak speed, but only over roughly 12–15 m. A useful...
USB-C Modding a 2000s iPod Classic: Step-by-Step Hardware Guide
Step-by-step guide to converting 5th-7th gen iPod Classics to USB-C. Covers compatible models, kits, pinouts, wiring, tools, and post-install checks.
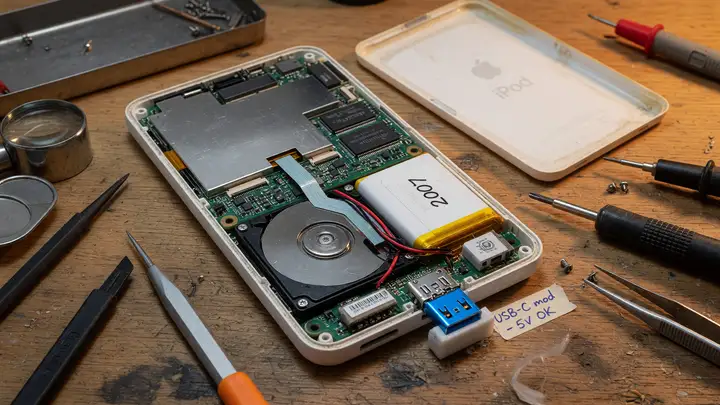
The 30 pin dock connector on 5th through 7th generation iPod Classics feels dated in 2025. These players still hold appeal thanks to their Wolfson DACs, expandable storage, and solid aluminum cases. Swapping the old port for USB C brings back normal charging and syncing without losing the hardware you like. Compatible Generations and Internal Layouts Three generations work best. They share the same 30 pin interface and leave enough room inside for a clean install. 5th / 5.5th gen (A1136 / A1237): Easiest case to...
Best Soldering Tips for Pinecil V3: The Ultimate Guide
A practical guide to selecting and using the right soldering tips for your Pinecil V3 iron, ensuring clean, reliable joints.
If you’re using a Pinecil V3, you already own a great iron. But the iron itself is only half the equation. The real difference in your soldering quality—the clean, reliable joints you want—comes down entirely to the tip you select. Using the wrong tip is the fastest way to frustrate yourself and end up with cold, sloppy connections. This isn't a guide on buying a new iron; it’s about matching the right tip geometry to the job at hand. We need to move past generic 'soldering tips' and talk about specific...
Fanttik E1 Max vs Xiaomi Mijia: Best Electric Screwdrivers for PC Building
Compare the Fanttik E1 Max and Xiaomi Mijia electric screwdrivers to determine which tool offers the best precision and performance for your next PC build.
When you’re building a PC, the last thing you need is a stripped screw head or a screwdriver that stalls halfway through a case panel. Choosing between the Fanttik E1 Max and the Xiaomi Mijia electric screwdriver comes down to what you prioritize: raw power and versatility, or refined, controlled precision. Both are marketed for electronics work, but they approach the job differently, and that difference matters when you’re dealing with delicate motherboard standoffs or stubborn case screws. If I had to take a...
Pinecil V3 Review: Why This $40 Tool Beats $200 Soldering Stations
Expensive isn't always better. We test the Pinecil V3 and show why this affordable, portable iron outperforms bulky, high-priced soldering stations.
Expensive isn't always better, especially when it comes to soldering irons. We tested the Pinecil V3 against the kind of bulky, high priced soldering stations you see on shelves, and the results are clear: portability and focused power beat sheer size every time. If your soldering work involves taking your setup to a friend’s house, working on a breadboard in a coffee shop, or just needing a reliable tool that doesn't take up half your workbench, the massive, multi port stations are overkill. They are designed for...
Pinecil V3 vs TS101: Which Portable Soldering Iron Wins?
Comparing the Pinecil V3 against the TS101 to determine the best portable soldering iron for electronics work.
Pinecil V3 vs TS101: Which Portable Soldering Iron Wins? If you’re looking to take your soldering work away from the bench, you’re probably looking at two names: the Pinecil V3 and the TS101. Both promise portability, but they approach the job with different philosophies. Don't buy one just because it’s cheaper or because you saw it advertised; you need to match the tool to the job you're actually doing. When I look at these two, the decision boils down to whether you prioritize raw, adjustable power or a more...